Are you dealing with a stubbornly clogged kitchen sink drain? Or are you planning to change your sink strainer? Removing a kitchen sink drain might seem hard, but it’s not. With just the right tools and steps, you will do it quickly.
This guide will cover all you need to know. about how to remove kitchen sink drain. Whether you’re a DIY pro or just starting, we’re here to help. You can save money by doing it yourself. Ready to take on your clogged sink or change the strainer? Let’s start and learn how to remove a sink drain easily.
Understanding the Basics of Kitchen Sink Drain Removal
Before you start, learning how to remove a kitchen sink drain is key. Doing it right protects your sink and piping. You’ll avoid big messes and save money by not making mistakes. Learning the right way to remove the drain is very important. It makes the process smooth and hassle-free. This means you save time and effort.
Following correct techniques to remove the drain has many benefits. It helps prevent damage to your sink and plumbing. It also makes the whole task easy and quick. Taking out the kitchen sink drain properly lessens the chance of leaks. Using the right method keeps your plumbing strong. This means fewer problems and less repair work later on.
So, why care about the proper removal? It ensures the sink drain is taken out well. This is important for fixing clogs or updating your sink. With the right steps, you do the job effectively.
Tools Required
Removing a kitchen sink drain needs the right tools for a smooth process. Here’s a list of what you need:
1. Pipe Wrench: This tool is great for gripping and loosening sink drain parts.
2. Pliers: Perfect for handling small pieces, such as nuts and bolts, during removal.
3. Screwdriver: You’ll need this to take out screws that secure the sink drain.
4. Plunger: Use it to clear any clogs before you start removing the drain.
5. Bucket or Container: A must to catch water or debris, keeping your work area clean and dry.
6. Putty Knife: Needed to clean off old putty or adhesive from the sink or drain.
7. Safety Gloves: Protect your hands with gloves; they help prevent injuries and keep your hands clean.
Having these necessary tools will help you remove your kitchen sink drain with ease. They prepare you for any issues and ensure a successful job.
Initial Steps Before Removing the Sink Drain
Before taking out the kitchen sink drain, several initial steps are crucial. Follow these steps to make sure you work in a safe, clean area. The first thing to do is stop the water from coming into the sink. Find the shut-off valve under the sink. Turn it off by twisting the handle to the right. This stops water flowing while you work. Otherwise it cause a water splash in every places like kitchen cabinets, shelves, stoves.
Then, clear out the sink. Take out any dishes, utensils, or items from the sink. You need enough room to do the work. Also, make sure the sink is empty of water to avoid messes while working. After turning off the water and emptying the sink, you can start. These steps prepare a clean, organized space. It makes removing the drain easier and more effective.
Dealing with Different Types of Sink Strainers
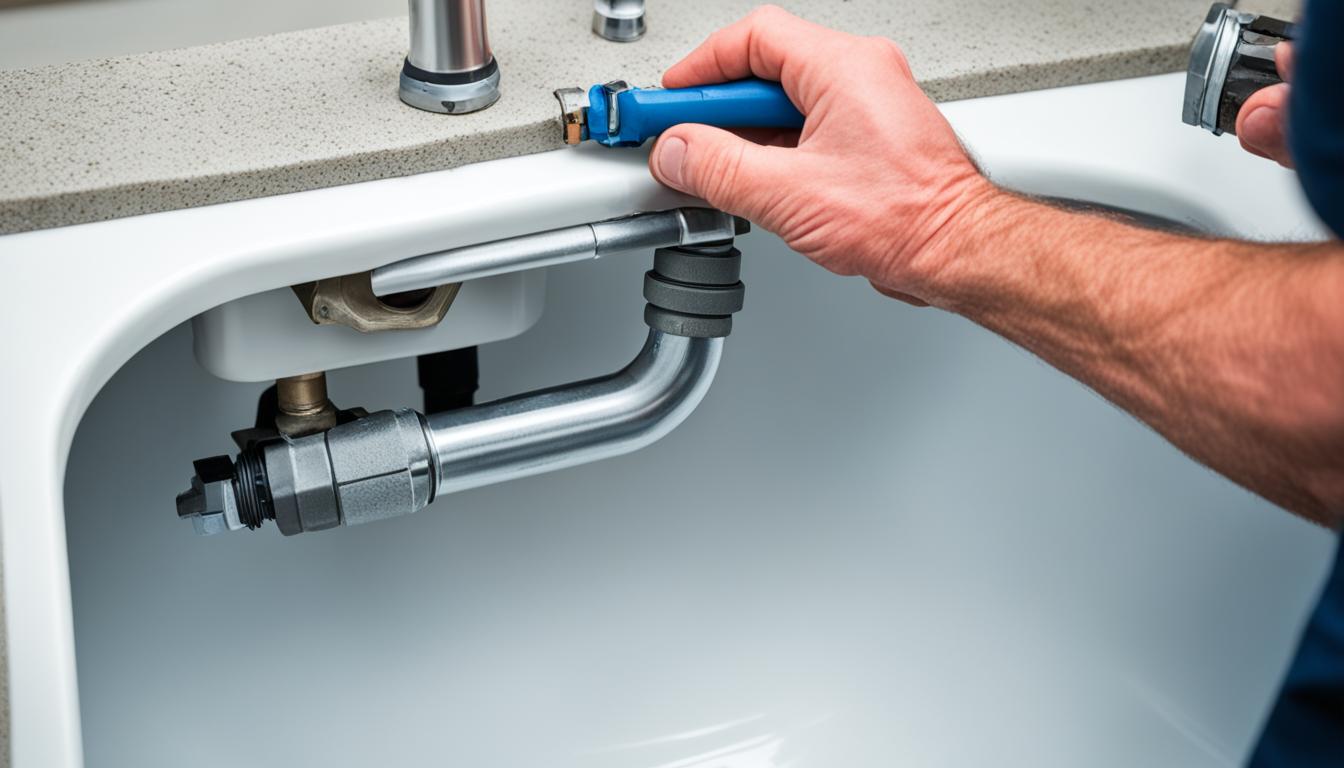
When you’re taking out a kitchen sink drain, the type of strainer is key. You’ll find two main types: locknut and bell washer strainers. Knowing the difference helps take them out the right way. A locknut sink strainer uses a locknut to hold it in place against the sink. To get it off, loosen the locknut with pliers or a wrench. Turn the locknut to the left until you can get the strainer out.
For a bell washer sink strainer, a bell-shaped washer creates a tight seal under the sink. This type needs the large retaining nut under the sink unscrewed. Again, use pliers or a wrench to turn the nut left and remove the strainer. Always turn off the water before working on a sink strainer to avoid flooding. It’s also smart to clean around the strainer before and after taking it out. This keeps the process neat and hassle-free.
Final Steps After Strainer Removal
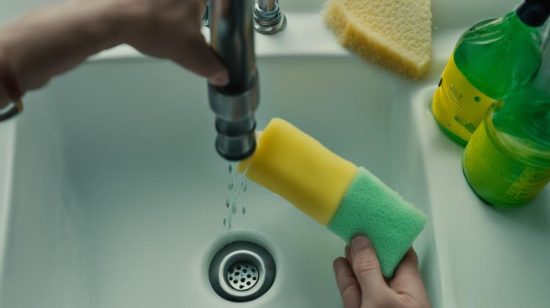
Now that the strainer is off, a few more steps ensure your drain is perfect. Clean the sink and check for damage before putting in the new strainer. This way, your sink will be all set for the new part. First, clean the sink well. Scrub it with mild soap and warm water. Get rid of all dirt and grime for a sparkling clean look.
Next, focus on the drain pipe. It’s key to stop up any clogs. A plumber’s snake or pipe brush can clear the pipe inside. Don’t forget to clean it out all the way down. After the pipe’s clean, check the sink for damage. Look for cracks or leaks hidden by the old strainer. Catching these issues early will prevent bigger problems later on.
Lastly, make sure the sink and pipe are clear of any debris. This step is crucial for the new strainer to fit and work right. By finishing with these steps, your sink will be clean and problem-free. Once you’re done, you’ll be all set to install the new strainer without worry.
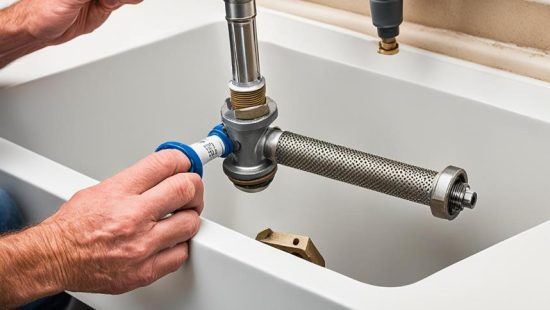
Prepping the Sink for a New Strainer Installation
Installing a new sink strainer starts with preparing the sink well. You need to get rid of old putty and clean the sink rim. This makes sure the new strainer fits snugly and doesn’t leak. First, take off any leftover putty from the sink. Gently scrape it with a putty knife. Watch out so you don’t accidentally damage the sink.
Next, it’s time to make the sink rim clean. Just use a bit of mild detergent and a soft cloth. Clean around the drain hole well to remove dirt and old putty. After the cleaning, rinse the sink rim with plenty of water. Then, make sure to dry it all up with a towel. It has to be completely dry before going on. This stops moisture from messing with the sealing. Finally, your sink is prepped for the new strainer. Follow the directions from the strainer’s manufacturer to install it right. Make sure it fits well and snug.
How to Remove Kitchen Sink Drain without Equipment
At times, you might need to remove a kitchen sink drain with no tools on hand. Maybe you’re in a hurry, or you prefer doing things yourself. There are ways you can do this without any equipment.
One way to take out a sink drain without tools is by using a plunger. First, close the sink’s stopper. Then, fill the sink with water to cover the drain. This creates suction. Next, place the plunger over the drain. Gently push and pull it several times. The suction helps to loosen the drain.
Another method you can try is with boiling water. Boil a pot of water. Carefully pour it down the drain after it’s boiled. The heat will help dissolve grease and other stuff that might be stuck. Let it sit for a while, then try to twist and pull the drain to take it out.
If those methods don’t work, you can try using a lubricant. Common household items like dish soap or cooking oil work well. Put plenty on the drain connection and let it sit. After a few moments, try turning and pulling the drain. The lubricant will reduce the friction.
Keep in mind, these ways might not always be effective. The results can vary depending on various factors. If these tips don’t help and you can’t
remove the drain, it’s best to get help. Trying too hard might damage the sink or plumbing.
These DIY methods can be a lifesaver when you don’t have tools. Just be careful and patient. If it gets too hard, don’t hesitate to call a professional. They can remove the drain safely.
Troubleshooting Common Issues During Strainer Replacement
When you replace a sink strainer, you might face a few challenges. But, knowing how to deal with these can make things easier. Let’s talk about common problems and how to solve them when changing a strainer.
One issue is a tight or stuck locknut. If it won’t budge with a wrench, use some penetrating oil. Let it sit for a while. Adding heat from a hairdryer can also help.
Leaking around the strainer is another problem. This happens if the seal is not good. To fix it, remove the strainer and clean off the old putty. Then, apply new plumber’s putty. This should stop the leak.
Slow-draining or blocked sinks can happen after you change the strainer. This could be a bigger clog. Try plunging or using a drain snake. A mix of baking soda, vinegar, and hot water might also work. If nothing helps, calling a plumber might be the next step.
FAQs
What tools do I need to remove a kitchen sink drain?
You will need a pair of pliers, a wrench, a bucket, and possibly a putty knife. These tools will help you loosen the nuts, catch any water, and scrape away any sealant.
How do I disconnect the P-trap from the sink drain?
Place a bucket under the P-trap to catch any water. Use pliers or a wrench to loosen the slip nuts on both ends of the P-trap and remove it carefully.
How do I remove the sink strainer?
First, loosen the large nut underneath the sink that holds the strainer in place using a wrench. Once it’s loose, you can push the strainer up from below and remove it from the sink.
What should I do if the strainer is stuck?
If the strainer is stuck due to old putty or sealant, use a putty knife to gently pry it loose. Be careful not to damage the sink surface while doing this.
How do I clean the area before installing a new drain?
After removing the old drain, scrape off any old putty or sealant from the sink with a putty knife. Clean the area thoroughly with a mild cleaner to ensure a smooth surface for the new drain installation.