How to Install Kitchen Cabinets Easily – DIY Guide
Thinking about a kitchen makeover? Ever wondered if you could handle the cabinet installation on your own? Or are you just someone who loves DIY, searching for easy instructions for installing kitchen cabinets as a newbie?
Putting up kitchen cabinets can look overwhelming at first. However, armed with solid advice, the right tools, and a bit of time, you can pull off a professional appearance.
This DIY guide will take you through fitting the kitchen cabinets, from making sure they’re in perfect condition to firmly fixing them on the wall. Ready to kick off this fulfilling project and spruce up your kitchen?
Key Takeaways
- Inspect the new cabinets upon arrival to check for any damage or missing pieces.
- Determine the highest point on the floor to establish a reference point for installation.
- Mark the top of the base cabinets and the bottom of the wall cabinets for accurate placement.
- Locate the wall studs for secure installation.
- Choose the appropriate hardware for your wall type.
How to Install Kitchen Cabinets Easily?
Inspect the New Cabinets
When your new cabinets arrive, it’s crucial to check them carefully. You want to ensure they are flawless for installing. Take your time to go over each piece. Compare them to your order to make sure they’re right. Here’s what you should do:
- Check for damage: Look for any damage as soon as the cabinets show up. Check for scratches or dents. If you find any damage, take pictures and contact the seller or maker immediately.
- Verify all components: Ensure you have everything you need. Look for cabinet parts such as hinges and handles. Also, ensure you have trim and filler strips if necessary.
- Pre-assembled cabinets: If your cabinets are pre-assembled, hold off on adding hardware or doors. This step makes putting them in place easier and avoids damage.
By doing a detailed check on your cabinets, you guarantee they’re ready for installation. This approach smooths out the installation and gets you closer to the kitchen you’ve always wanted.
Locate High Spots on the Floor
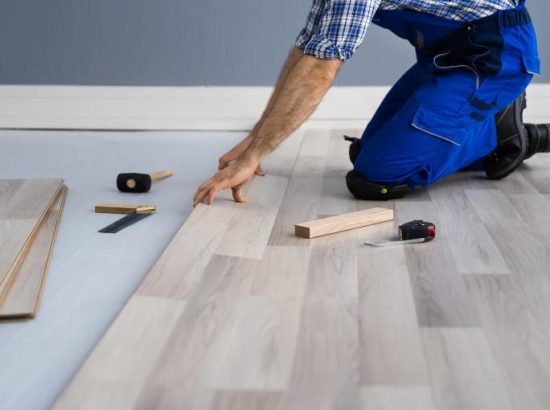
Before starting to install your kitchen cabinets, find any high spots on the floor. High spots can mess with the stability and how well your cabinets line up. So, dealing with them early is key.
You’ll need a straight board and a level to find these high spots on the floor. Here’s how:
- Find the spot on the floor that’s the highest. You’ll use this as a starting point for setting up your cabinets.
- Put the straight board on the floor. Then, place the level on it.
- Move the board around the floor. Look for places where the level shows the floor isn’t even.
- When you find a high spot, mark it with a pencil or tape.
- Keep repeating this process away from the wall by 24 inches. Do this in different spots to double check.
After marking these high spots, it’s time to make the cabinets level. You might use shims to fix their height. Shims are easier than cutting cabinets to fit a wavy floor. They guarantee a pro-level installation.
Mark the Top of the Base Cabinets

Inspect the new cabinets and find the high spots on the floor. It’s crucial to mark the tops of the base cabinets correctly. This is key for a well-installed and aligned kitchen.
Start by measuring up 34 1/2 inches from the floor’s highest point. This height will be where to mark the top of the base cabinets. Use a tape measure or ruler for precise measurements.
Then, draw a level line on the wall. It should go around the room where the cabinets will sit. This line ensures all cabinets are the same height.
Now, place the base cabinet boxes without attaching them. This is called dry fitting. Remember where each cabinet goes on the wall for the next steps.
As you fit the cabinets, leave room for the face frames. Face frames are important for the doors and drawers. Keeping space for them ensures everything fits well.
Last, check your measurements for openings and door directions. This confirms the cabinets fit your appliances, plumbing, and other elements. Doing this now saves you trouble later.
Now, you’ve marked and prepared the base cabinets. Next, let’s mark the bottom of the wall cabinets. This is what we’ll cover next.
| Step | Description |
|---|---|
| 1 | Measure up 34 1/2 inches from the high point on the floor |
| 2 | Create a level line on the wall |
| 3 | Dry fit the base cabinet boxes and mark the location of each cabinet on the wall |
| 4 | Maintain space for the face frames |
| 5 | Check measurements for openings and door directions |
Mark Bottom of Wall Cabinets
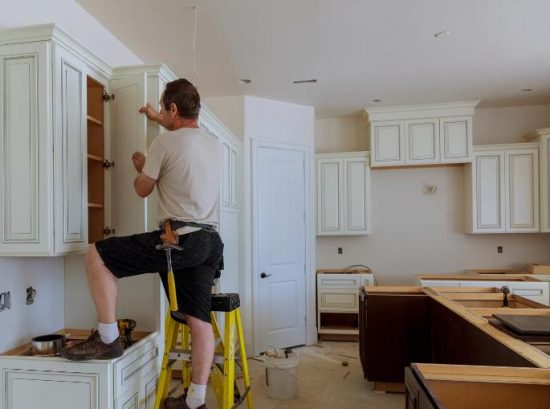
After marking the top of base cabinets, you should mark the bottom of wall cabinets too. This makes sure they are properly placed and have enough space above countertops. This step is very important.
To do this, draw a straight line 19 1/2 inches above the top of base cabinets. This accounts for both the countertop’s thickness and needed space.
Use a pencil and a level to mark where each wall cabinet goes. This guides you and keeps everything even and straight.
Installing wall cabinets before base cabinets is usually best. It avoids problems with wall cabinets fitting later on.
Accurately marking the bottom of wall cabinets moves you closer to a pro-looking kitchen. It’s a key step in cabinet installation.
Locate Wall Studs
When installing kitchen cabinets, securing them firmly is key. Studs in the wall offer the best support for this. Let’s see how you can find and work with studs. This will make sure your cabinets are totally secure.
- Use a stud finder: This nifty tool finds hidden wall studs. Just move it across the wall. It beeps or lights up where it finds a stud.
- Mark the stud centers: After finding the studs, mark the center of each one with a pencil. This marks where your cabinets should be.
- Extend reference lines: To keep the marks straight, use a level. Draw lines from the floor to the ceiling. This makes sure your cabinets are level.
- Transfer stud locations: Mark the back of the cabinets where the studs are. This shows you where to drill holes. Drilling into the studs helps secure the cabinets.
- Choose suitable hardware: For hanging the cabinets, choose the right screws for your wall type. Sturdy screws are best for studs. If your wall is drywall, use toggle bolts for extra support.
Why are Wall Studs Important?
Studs are essential when installing cabinets. They support the weight well, keeping cabinets from wobbling or drooping. When cabinets are attached to studs, they’re less likely to get damaged by accidental hits or movements. This way, your kitchen cabinets will last longer.
It’s vital to secure cabinets to studs properly. Stud finders, marking where the studs are, and using the right screws or bolts is crucial. It ensures your cabinets are not only safe but also perfect for your kitchen space.
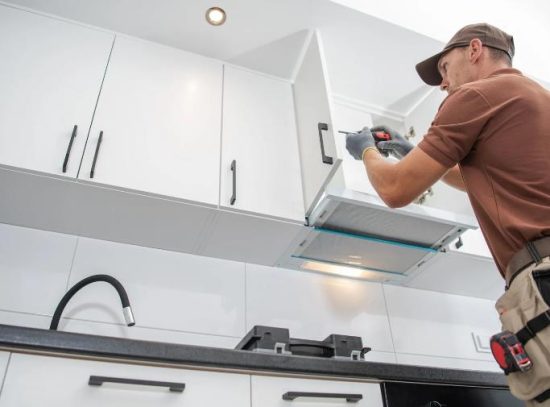
Begin Corner Installation
Start your kitchen cabinet setup by placing the corner cabinets first. This way, the foundation for the whole install gets solid. It ensures everything lines up perfectly later on.
Take off the cabinet doors before kicking things off. Then, mark where the studs are on the wall onto the cabinet. Doing this lets you put the cabinet in the right spot and secure it tightly.
Use a level to check if the cabinet is straight. If it’s not, use shims to even it out. This makes the whole setup look pro.
When the cabinet is straight and level, nail it to the wall. Make sure to pick the right screws and bolts. This makes the cabinet strong and safe.
Now that the corner cabinet is up, work on the rest outward. Keep the same steps: mark the studs, check if it’s level, then fix it to the wall.
Tips for Leveling Cabinets
- Use a level in both horizontal and vertical directions to ensure cabinets are plumb and aligned.
- Make small adjustments with shims if needed to achieve a level and uniform installation.
- Check the level frequently throughout the installation process to maintain accuracy.
- Pay extra attention to corners and joints to achieve seamless transitions between cabinets.
Attach Cabinets Together
Now that your first cabinet is secure, let’s join all your cabinets together seamlessly. Use C-clamps to attach the next cabinet to the first one.
Adjust and re-clamp the cabinets until they sit level and flush. This is key for a neat look.
Next, drill pilot holes and use screws to link the cabinets firmly. Avoid attaching the cabinets through their side panels.
Focusing on the face frame boosts their stability. This is a critical step in the process.
After securing the cabinets, tighten the mounting screws. It ensures they stay in place. Double-check that they are still level and in line.
By using clamps and screws, your kitchen cabinets will be sturdy. They will last a long time.
FAQ
Can I install kitchen cabinets myself?
Yes, you can do it on your own. All you need are the right tools and some advice. It’s a project many can manage well.
How do I install kitchen cabinets for beginners step by step?
Here’s how you can start installing kitchen cabinets. First, check the new cabinets. Next, find and mark high spots on the floor. Then, mark the cabinets’ top and bottom parts. After, locate the wall studs. You can then start with the corner cabinets. Remember to attach them together.
How are kitchen cabinets attached to the wall?
Kitchen cabinets get attached to the wall. This is done by securing them to the wall studs. Always use the right screws for this. This way, the cabinets are stable. They won’t fall or shift easily.
What is the best way to set up kitchen cabinets?
The best method is a step-by-step process. First, inspect the cabinets. Then, find the highest floor point and mark the cabinets. Locate the wall studs. Follow this with a secure and level installation of the cabinets.
How do I install kitchen cabinets?
First, check the cabinets for any issues. Find the highest floor point. Mark the cabinets as needed. Locate the wall studs. Next, choose the right screws. Start with the corner cabinets and then attach them. Make sure everything is level.
What are some cabinet installation tips for easy kitchen cabinet installation?
For easier installation, inspect the cabinets first. Then, find high spots on the floor. Mark the cabinets and locate the wall studs. Lastly, attach the cabinets securely for a stable setup.