How to Plunge a Toilet Like a Pro?
Introduction
Toilet clogging is one of the most terrible issues faced in houses. It can be complicated if it is solved slowly. With the help of the right equipment and techniques, everyone can clean toilet clogs using a plunger like a professional. This comprehensive guide will walk you through the steps on how to plunge a toilet like a pro.
Tools and Materials Required
Before diving into the plunge, gathering the necessary tools and materials is essential.
Here’s what you’ll need:
Plunger
The most crucial device for unclogging a toilet is the plunger. Opt for a heavy-duty rubber plunger with a flange at the lowest for higher suction. Having the right plunger ensures maximum effectiveness in dislodging the clog. Ensure the plunger’s rubber cup is undamaged and cracks-free to preserve a robust seal. Choose a plunger with a solid and steady grip during use.
Rubber Gloves
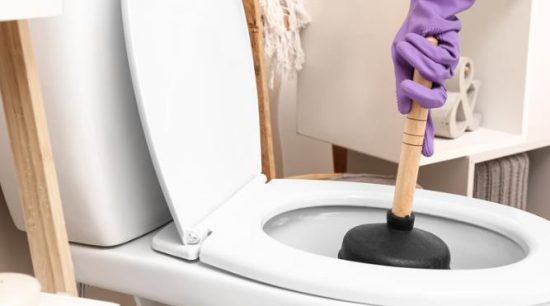
Wear rubber gloves to protect your palms from germs and microorganisms. Safety and hygiene should always come first when handling toilet-related responsibilities. Rubber gloves also prevent harsh chemical substances from being used in toilet water. Ensure the gloves are in shape and thick to prevent water from seeping in at some stage in the unclogging process. Disposable gloves are handy for easy cleanup after use.
Bucket
Keep a bucket nearby to hold water and debris that may splash out during the plunging process. This helps prevent any mess from spreading further and makes cleanup more manageable. Choose a sturdy bucket with a wide opening for easy access and handling. Position the bucket tactically to catch any overflow water from the toilet bowl. Empty the bucket after use to avoid spills and odors.
Old Towels or Rags
Lay down old towels or rags around the toilet’s base to seize any spills and make cleaning easier. This easy step minimizes the hazard of water harm to the surrounding area. Use absorbent towels or rags to take in any water that can leak out through the unclogging manner. Place the towels or rags strategically to absorb water and avoid splashes around the toilet.
Plumber’s Snake (Optional)
A plumber’s snake can be a handy reachable device for stubborn clogs that cannot be dislodged with a plunger. It allows you to reach deeper into the drain and cut up the blockages. Choose a plumber’s snake with a flexible yet durable steel cable for the most efficient overall performance. Familiarize yourself with the operation of the plumber’s snake before use to keep away from causing harm to the plumbing gadgets. Exercise caution while using a plumber’s snake to prevent accidents and damage to the restroom bowl or pipes.
What are the types of Plungers?
Not all plungers are created the same. There are two main types of plungers commonly used for unclogging toilets:
Cup Plunger
This plunger is flat or dome-shaped, with a rubber cup at the end of a timber or plastic handle. Cup plungers are perfect for bathrooms as they provide a good seal around the drain hollow, allowing maximum suction. Due to their flexible layout can also be used for sinks and tubs, making them a reachable device across the house. The flat floor of the cup makes it clean to create a seal on various drain sizes, ensuring effective unclogging. Additionally, cup plungers are commonly extra low-priced and expensive compared to other plungers, making them a popular choice for homeowners.
Flange Plunger
Also known as a toilet plunger, this flange plunger has an additional rubber flap (flange) that extends from the bottom of the cup. This design was mainly created to suit the form of restroom drains, making them more potent for unclogging toilets than the famous cup plunger. The flange ensures a higher seal between the plunger and the toilet bowl, resulting in expanded suction strength and quicker unclogging. Flange plungers are designed with restroom drains in mind, considering extra precision and performance when tackling severe clogs. While they may be slightly more steeply-priced than cup plungers, their specialized layout makes them profitable funding for families coping with common lavatory clogs.
How to Plunge A Toilet Like A Pro?
Now that you have everything you need, let’s get down to business:
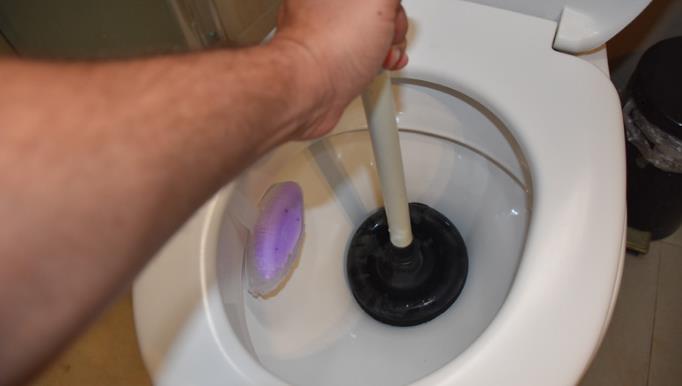
Step 1: Create a Seal
It Places the plunger over the drain straight to create a perfect seal. This seal is essential for the suction needed to dislodge the clog efficiently. Please take a second to put the plunger efficiently, ensuring it covers the complete drain without any gaps. Press down firmly on the plunger to ensure a perfect fit in shape against the surface of the bathroom bowl. A proper seal will save your air from escaping and maximize the suction strength of the plunger.
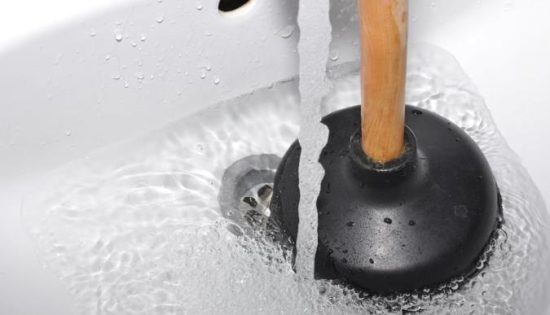
Step 2: Apply Pressure
Once the plunger is securely in place, it’s time to apply stress. Push down firmly on the plunger to create downward force and then pull up sharply to create suction. This action enables dislodging the clog by alternating between pushing and pulling motions. Repeat this method several times, preserving the seal with each plunge. The aggregate of downward strain and suction works to interrupt the clog and clean the drain efficiently. Be sure to apply controlled actions to avoid breaking the seal and losing suction power.
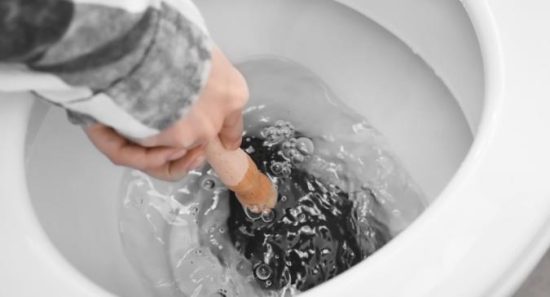
Step 3: Check for Signs of Progress
After a few plunges, pause the movement. Listen for the sound of water draining or observe the motions inside the lavatory bowl. These are the symptoms that the clog is starting to break down. If you note any development, keep plunging until the drain is fully cleared. Take your time and be patient; a few clogs might also require multiple attempts to clean. Persistence and observation are crucial to determining the effectiveness of your efforts.
Step 4: Flush and Repeat
Once you’ve efficiently unclogged the toilet, it is time to flush and check out the results. Flush the bathroom to clear away any remaining particles and verify that the water drains away quickly. If the water level goes down without any signs and symptoms of resistance, congratulations – you’ve conquered the clog! However, if the water stays stagnant or drains slowly, it may suggest that the clog continues to be partly obstructing the drain. In such instances, repeat the plunging system until the clog is completely cleared. Flushing among attempts helps ensure that the drain is clear and geared up to be used.
Step 5: Cleanup
After the clog has been cleared and the restroom is functioning nicely again, it’s important to ease up the place and hold hygiene. Dispose of all the waste and rinse the plunger and bucket with hot water and cleaning soap to eliminate any strains of debris and bacteria. Thorough cleanup keeps your bathroom clean and sanitary and also facilitates extending the lifespan of your tools. Proper protection and cleaning guarantee that your plunger will work efficiently and prevent the spread of germs and odors.
Conclusion
In the end, mastering the skill of toilet plunging is a talent that anyone can research with a bit of exercise and the right strategies. By following the steps mentioned in this guide and taking the necessary precautions, you may confidently address even the toughest clogs. With the right tools, know-how, and method, you can keep your plumbing going for walks easily and avoid messy mishaps.
Related Articles:
FAQs on how to plunge my toilet
1. How do I know if I need to plunge my toilet?
You may need to plunge your toilet if it is not flushing properly, water is rising to the brim after flushing, or you notice gurgling sounds when flushing. These are common signs of a clogged toilet.
2. Can I use any plunger to unclog my toilet?
While any plunger may work to some extent, it’s best to use a heavy-duty rubber plunger with a flange at the bottom for better suction. This type of plunger is specifically designed for unclogging toilets and provides maximum effectiveness.
3. How do I create a proper seal with the plunger?
To create a proper seal, place the plunger over the drain hole in the toilet bowl, ensuring it covers the entire opening without any gaps. Press down firmly on the plunger to ensure a tight seal against the surface of the bowl.
4. How much pressure should I apply when plunging?
Apply firm but controlled pressure when plunging. Push down firmly on the plunger handle, then pull up sharply to create suction. Repeat this motion several times while maintaining the seal with each plunge.
5. What should I do if the clog doesn’t clear after plunging?
If the clog persists after plunging, you can try using a plumber’s snake to reach deeper into the drain and break up stubborn blockages. Alternatively, you may need to call a professional plumber for assistance.