Particularly when they include clogged toilets, plumbing problems can be frustrating. It could be worthwhile to try using a toilet auger to remove the blockage yourself before you hire a professional. Knowing how to use a toilet auger efficiently will help you save money and time. Acquiring this ability can also help you avoid the hassle of a dysfunctional toilets by offering a speedy fix in an emergency. Additionally, becoming skilled with a toilet auger expands the possibilities for house repair and improves your do-it-yourself abilities.
What is a Toilet Auger?
A toilet auger, often known as a plumbing snake, is a specialist equipment for clearing obstructions in toilet pipes. With a long, flexible rod that snakes through the toilet drain, the auger is made to reach further into the plumbing than a normal plunger. This shaft is great for removing more tough clogs because of its corkscrew-like tip, which helps grasp and pull out or break apart obstacles.
This tool is especially helpful for blockages like dense accumulations of everyday debris or tree roots that are too difficult for a plunger to manage. Its design also reduces the possibility of scratching the porcelain of the toilet, ensuring a secure operation. Ease of use and effectiveness make the toilet auger a preferred choice among homeowners for quick plumbing fixes.
Parts of a Toilet Auger
To effectively operate this device, it’s essential to familiarize yourself with its main components:
- Handle: Usually a hand crank that rotates the cable inside the tube.
- Shaft: A long, flexible metal cable that extends into the drain.
- Corkscrew or Bulb Head: The end part of the auger designed to dislodge and remove clogs.
- Protective Sleeve: This surrounds the shaft to protect the porcelain in the toilet bowl from scratches. remove points and convert it into one sentence.
How to Use a Toilet Auger?
Prepare the Area
First, make sure there is no excess water or debris in the toilet bowl. This step is essential because it makes the drain easier to see and access, reduces mess, and increases the efficiency of the unclogging procedure. Take out anything that could get in the way of your ability to access the drain, such as cleaning supplies or toilet fresheners. Furthermore, having towels on hand and wearing gloves will assist contain any spills or splashes that may occur. In addition to making things go more smoothly, this preparation guarantees that you keep your surroundings tidy and sanitary while addressing plumbing problems.
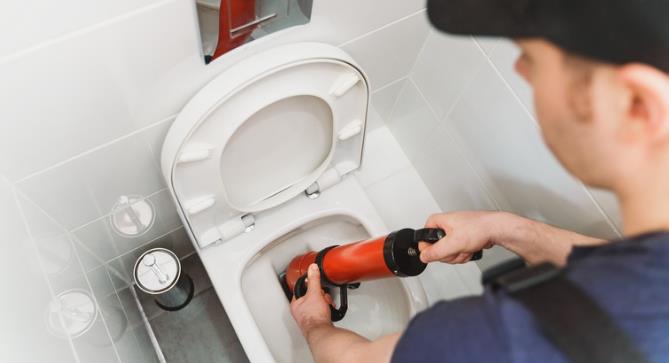
Position the Auger
Gently place the auger’s head inside the toilet drain. It’s crucial to make sure the scratch-resistant sleeve is positioned correctly to avoid scratching or damaging the toilet bowl’s porcelain. The sleeve acts like a shield between the sensitive toilet surface and the auger’s metal shaft. Make sure the auger is put straight to prevent excessive pressure on the bowl’s sides, which could lead to breaking. To regulate the movement and penetration depth of the auger, hold onto the handle firmly when inserting it. With this accuracy, you can remove the blockage efficiently and without damaging the functioning of your toilet.
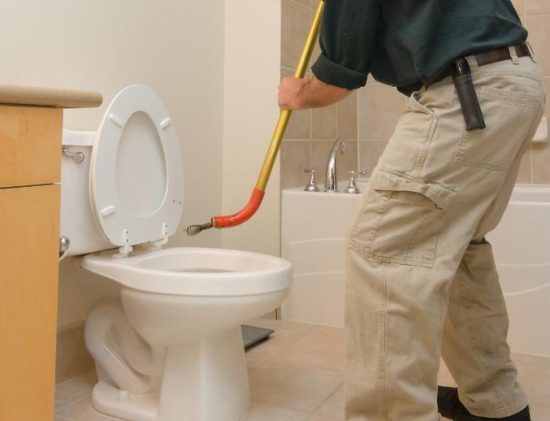
Extend the Cable
Slowly spin the auger handle to push the flexible cable deeper down the drain. This should be done progressively until the auger encounters resistance, which indicates that the clog has been reached. The key in this situation is to lengthen the cable without using too much effort, which could harm the auger or the toilet. As you turn the lever, keep the pressure constant and even. This will make it easier to get the auger around the toilet drain’s curve.
Pay attention to any variations in sound, since these can reveal if the auger is just navigating around pipe bends or forcing its way through an obstruction. By taking this cautious method, you can be confident that you will reach the clog and remove it without harming your plumbing system.
Dislodge the Clog
Push the auger forward slowly and keep turning the handle until you destroy the resistance. The dual action of the corkscrew or bulb head at the end of the cable facilitates the breaking apart or attachment of the trash. Finding the right amount of pressure to clear the clog while avoiding pushing it deeper into the drain requires much thought. In order to minimize the chance of compacting the debris further down the pipe, relax a little if you feel the blockage starting to give way. This technique protects against future plumbing system damage in addition to successfully removing the obstruction.
Retrieve the Auger
Once the clog has been cleared, turn the lever again and gently retract the auger. This helps remove any fragmented material or guarantees that the clog is removed with the auger. Maintaining the rotation is crucial since removing the auger straight out of the drain without spinning could leave some of the clog inside the pipe. To find out if the clearing operation was successful, monitor the debris that emerges as you remove the auger. If the impediment is very stubborn or extensive, it may require much effort. By carefully repeating this method, you can make sure that the whole blockage is eliminated and your toilet is fully functioning again.
Flush the Toilet
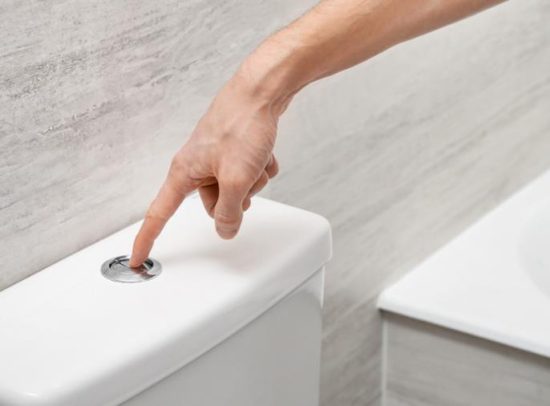
To make sure the clog has been cleaned entirely, flush the system after the auger has been removed fully. This is an important stage since it confirms that the toilet is working and that your efforts have been successful. Smooth flushing of the toilet is a sign that the obstruction has been effectively cleared. If the water slowly rises or drains, more work might be needed to remove the obstruction entirely. It’s critical to keep a close eye on the flush behavior to see if more augering rounds are required to completely fix the problem.
By following these steps, you can effectively use a toilet auger to clear stubborn clogs, saving time and possibly the cost of hiring a professional.
Conclusion
Having a toilet auger on hand is a practical choice for any homeowner. It not only empowers you to handle sudden plumbing issues on your own but also ensures you can maintain your home’s facilities without incurring excessive service charges. Remember, the key to effectiveness lies in how to use a toilet auger properly. With this knowledge and a bit of practice, you can tackle even the most stubborn toilet clogs with confidence.
FAQs
How do I prepare to use a toilet auger?
Begin by ensuring the toilet bowl is free of excessive water and any debris. Remove objects that might obstruct access to the drain and wear gloves for hygiene and safety. Having towels handy can also help manage any spills.
How do I insert the toilet auger into the toilet?
Carefully place the head of the auger into the toilet drain, ensuring the protective sleeve is correctly positioned to avoid scratching the porcelain. Keep the auger straight to prevent pressure on the sides of the bowl.
How do I use the auger once it’s positioned?
Turn the handle slowly to extend the flexible cable into the drain until you meet resistance from the clog. Maintain steady pressure and listen for changes in sound that indicate the auger is effectively engaging with the blockage.