When it comes to maintaining your toilet’s efficiency and preventing potential plumbing issues, understanding how to adjust water level in toilet bowl is crucial. Not only can you conserve water by changing the water level, but it also guarantees that your toilet works correctly. To provide workable solutions you can use at home, we will look at three basic methods in this article for controlling the water level in various toilet systems.
Why Maintaining the Water Level is Important?
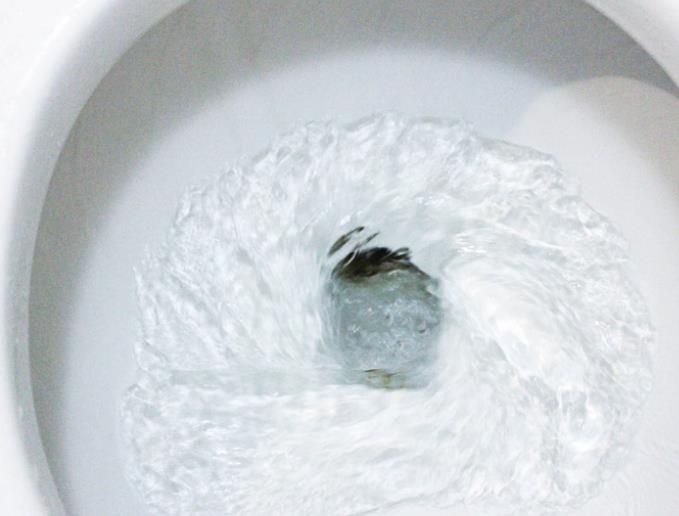
More than just an aesthetic choice, the water level in a toilet bowl is essential to the toilet’s functioning. Appropriate water levels aid in avoiding issues, including inadequate flushing, overflow, and excessive water use. Waste occurs when insufficient water is in the bowl, and water costs go up. Conversely, when there is too much water in the bowl, waste remains in the bowl. Maintaining the proper water level can improve every flush’s effectiveness, improve sanitation, and allow for less water use. By guaranteeing a sufficient flush that cleans the bowl efficiently, keeping the water level at its optimal level further reduces the chance of jams.
Additionally, it maintain the integrity of the plumbing seals, as fluctuations in water level can stress these components over time. By optimizing the water level, homeowners can also prevent the annoying “ghost flushing,” where the toilet flushes itself due to water leaks from the tank.
3 Easy Methods to Adjust Your Toilet’s Water Level
Method 1: Adjust the Float Mechanism
Open the Tank
To start, carefully remove the toilet tank lid to make the interior parts visible. To avoid any damage, setting the lid on a level, sturdy surface is a good idea. This access is essential because it gives you access to the flushing system’s control systems, such as the float mechanism that adjusts the water level. To ensure that your adjustments are accurate, ensure you have access to and clear visibility of these components. Take advantage of this chance to visually inspect the inside parts for signs of wear or corrosion that may require care.
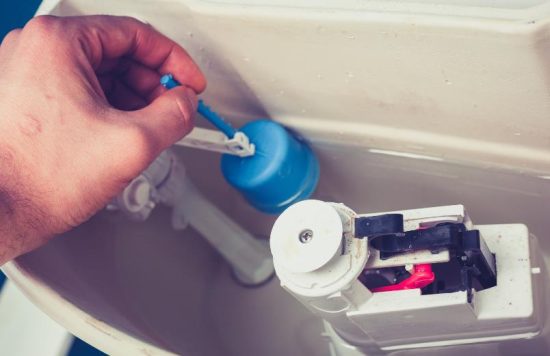
Locate the Float
Check inside the tank to find out what kind of float mechanism your toilet utilizes. The majority of toilets come with a cup-style float or a float ball. The cup-style float moves along a vertical column, whereas the float ball is usually attached to an arm. When making necessary changes, you need to know which type you have. Acquainting yourself with the particular float mechanism will enable you to handle the water level adjustments and prevent component damage efficiently. Furthermore, understanding the configuration can help you make the right purchase of replacement parts in the future.
Adjust the Float
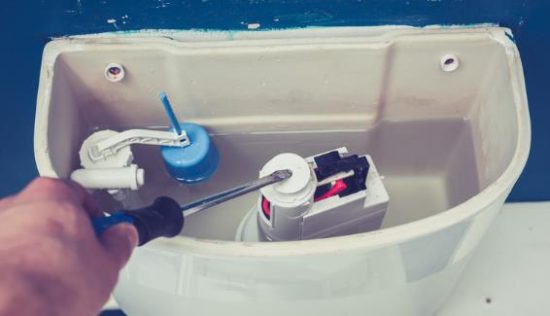
For a float ball: Locate the screw on the top of the fill valve, which is attached to the float arm. Using a screwdriver, twist this screw to adjust the arm length. Turning it clockwise will raise the float, increasing the water level, and make it turn into counterclockwise will lower the float, decreasing the water level.
For a cup-style float: This float adjusts differently. Gently slide the float cup up to increase the water level or down to decrease it. Once you’ve found the desired position, secure it by tightening the adjustment clip on the float column. This clip ensures the float maintains its position after adjustments.
Test and Retest
Once the necessary modifications have been made, flush the toilet to see the new water level. Ensure the water stops at the level you want by watching how it fills. Repeat the adjusting procedure if the level is not where you want it to be. It could take a few tries to get it right because it can be tricky to strike the ideal balance between water conservation and ideal flushing. It’s helpful to watch for leaks or strange noises during this testing step, as they could point to issues elsewhere in the flushing mechanism. By continuing to adjust the settings, you can make sure your toilet runs smoothly and gradually uses less water.
Method 2: Check and Replace the Flapper or Seal
Inspect the Flapper
The flapper or seal, which is found at the bottom of the tank, should be examined first. This rubber part keeps water in the tank until the toilet is flushed; therefore, it’s essential. Cracks, brittleness, or signs of mineral buildup may hinder its function, so carefully inspect it for these issues. Water leaks into the toilet bowl, which can cause the water level to drop suddenly and result in repeated refilling sounds, are typically caused by a defective flapper.
Remove the Old Flapper
If the flapper shows wear or damage, it’s time to replace it. Remove the flapper from the lift chain and carefully unhook it from the tank’s overflow tube. Use it carefully so as not to harm any connected parts. Because there are many variations, bringing the old flapper with you when you buy a replacement is a good idea to ensure you receive the right size and type for your toilet. Otherwise, there may be a better fit.
Install the New Flapper
Secure the new flapper to the tank’s overflow tube base once you have the suitable replacement. Connect it to the same hooks the old one was fastened to to ensure it stays in place. Next, put the flapper’s lift chain back on. When the flapper is closed, make sure there is a small amount of chain slack; this keeps the flapper from being overly compressed and aids in the formation of a strong seal. Ensure the flapper covers the valve opening entirely and evenly to prevent water leaks. After everything is fastened, manually raise the flapper to ensure it functions properly and returns to its sealing position effortlessly.
Flush to Test
This will be the last step of this method. Once the new flapper is installed, conduct a flush test to ensure it functions correctly. Watch as the tank refills: the water should stop at the proper level, and the flapper should remain firmly in place, creating a tight seal. If the water continues to flow or dribbles into the bowl, recheck the chain adjustment and ensure the flapper is appropriately aligned with no obstructions. Adjustments might be necessary to achieve perfect operation.
Method 3: Adjust the Fill Valve Directly
Identify the Fill Valve
Find the fill valve in your toilet tank to start. This part is usually located on one side of the tank and is taller than the other mechanisms. It is connected to a water supply line. After every flush, the fill valve regulates the amount of water that enters the tank. Understanding this component is essential since changes to the fill valve immediately impact the water level and general performance of your toilet. Before making any changes, please take a moment to see the valve in action during a flush cycle to understand its operation better.
Adjust the Fill Valve Height
Contemporary fill valves frequently have a height adjustment option to accommodate various tank capacities. First, unlock the valve by twisting its body in the opposite direction, then adjust its height. After that, you can push it down to lower the total water level or pull it up to raise it. After you get the height you want, lock the valve in place by rotating it clockwise. To maximize the flush and minimize water usage, the water must be adequately filled.
Fine-Tune the Water Level
The fill valve’s side or top have a little screw or lever that can be used to adjust after the height. The precise control over the amount of water that fills the tank is made possible by this screw. To raise or lower the water level, turn the adjustment screw in a clockwise or counterclockwise direction. It’s best to start softly and monitor the results periodically because small changes can have a significant impact. To precisely measure the change in water level, be patient and let the tank fill up entirely in between changes. If you attempt to adjust it more than once without success, ensure the fill valve isn’t broken or clogged. Adjusting this setting regularly can help preserve your toilet’s effectiveness and cut down on wasteful water use.
Perform a Flush Test
After making the necessary adjustments, run a flush test to see what happens. This concludes this method’s steps. This test is essential to ensure that the toilet operates correctly and without problems and that the fill valve stops adding water at the appropriate level. You might have to make the modifications again if the water level is not what you anticipated. Continue testing until the ideal water level is reached, guaranteeing optimal and efficient toilet performance.
Conclusion
Mastering your toilet’s water level adjustment can significantly impact its performance and efficiency. Whether you’re working with Korky, Fluidmaster, or Glacier Bay components, these three methods provide straightforward, do-it-yourself solutions for maintaining optimal functionality in your bathroom. Remember, an adequately adjusted water level ensures efficient flushes and conserves water, making it an essential skill for any homeowner.
FAQs
How often should I check the water level in my toilet bowl?
It’s a good idea to check the water level at least once every few months or when you notice changes in the toilet’s flushing performance.
What should I do if adjusting the water level doesn’t fix the flushing problem?
If water level adjustments do not resolve flushing issues, consider inspecting the flapper and drain for leaks or blockages.
Can improper water levels lead to leaks?
Yes, if the water level is too high, it can lead to minor leaks and water wastage. Always ensure the water level is set according to the manufacturer’s guidelines.
Is it necessary to turn off the water supply before making adjustments?
Yes, turning off the water supply prevents flooding and allows you to adjust without the tank refilling.