Replacing a toilet flapper is a typical household task that can increase the efficiency of your toilet and save water waste. You may avoid the problems of a constantly running toilet and save money by learning how to do this simple plumbing task. This blog will guide you through the necessary procedures on how to replace toilet flapper, including information on the parts, tools, and actual method. Let’s get started on this do-it-yourself job to make sure your toilet works correctly.
What is the Toilet Flapper?

The toilet flapper is a key component of your toilet’s tank. It is in the role of storing water in the tank and releasing it when a flush is performed. Water can flow from the tank into the bowl when you press the flush handle, lifting the flapper. A broken flapper can cause water to run continuously, increasing your water costs and perhaps causing damage to your bathroom floor.
The flapper itself is often composed of silicone or rubber and is fastened to the base of the tank via a chain that is attached to the flush lever. Leaks may occur from this component’s damage or misalignment over time. The first step in replacing your toilet flapper is to determine which type is appropriate and to make sure it fits the model of your toilet.
why do we need to replace toilet flapper?
Replacing a toilet flapper is an important maintenance activity that keeps your toilet’s flushing system running smoothly. Preventing water waste is one of the main reasons to replace a toilet flapper. A malfunctioning flapper frequently causes water to flow continuously from the tank to the bowl even when the toilet isn’t being flushed, which can waste a lot of water. You may make sure that water is only discharged while flushing and that it stops properly by installing a new, correctly fitting flapper.
The replacement of the flapper is also essential if you want to lower your water expenses. A leaking flapper can waste many gallons of water every day, which can result in severe water bill inflation. You can benefit from lower monthly water bills if this issue is resolved.
What are the Main Advantages?
Another important benefits of replacing your toilet flapper is more effective flushing. Weak flushes that don’t fully clean the bowl could be caused by a flapper that is outdated or broken. This often requires numerous flushes, which further raises the water usage. The flush can operate fully again with a new flapper, which guarantees that all waste is removed at once. Moreover, a toilet that runs nonstop can leak and harm the flooring in your bathroom. This continuous wetness, particularly in multi-story buildings, can eventually cause the floor materials to crack and may even have an impact on the underlying structures. Replacing the flapper helps to prevent such problems and ensures the structural integrity of your bathroom.
Another reason to replace your toilet flapper is to keep your bathroom hygienic. A faulty flapper may result in insufficient flushing, compromising the hygiene of the toilet and, by extension, the entire bathroom. Ensuring that the flapper works properly helps to keep the environment clean and free of potential health dangers.
Also, changing a toilet flapper is an easy do-it-yourself project that can save more serious plumbing issues later on. It’s a preventative step that increases the flushing mechanism’s longevity and reliability, making it a crucial component of house care. You can spare yourself the trouble and financial burden of future costly repairs by maintaining the functionality and condition of your toilet.
Important Tools Required
- Adjustable Wrench
- Gloves
- Sponge and Bucket
- Replacement Flapper
Steps to How to Replace Toilet Flapper?
Turn Off the Water Supply
The water supply valve for the toilet should be found first. It is usually located behind or to the side of the toilet, close to the ground. To stop the water flow into the tank, close this valve by turning it clockwise. This is an essential initial step since it keeps fresh water from getting into the tank while you’re working. Verify that the valve is fully closed to prevent any unforeseen water flow. This will make working inside the tank safer as well as keep your work area dry.
Drain the Tank
To empty the tank of water as much as possible, flush your toilet. After flushing, some water is likely to stay at the bottom of the tank. Squeeze the remaining water out of the sponge and move it to a bucket. To properly replace the flapper, the work area must be fully dry, which is why this step is crucial. Ensure that all of the water is gone to avoid any spills while doing this.
Remove the Old Flapper
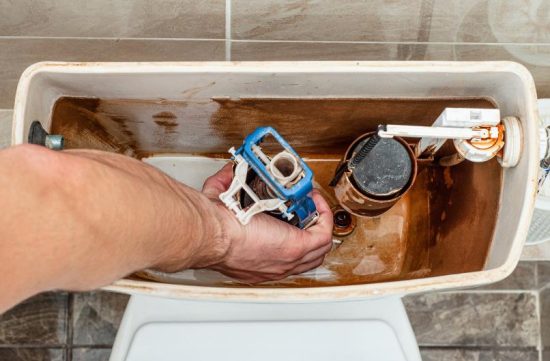
Locate the old flapper, which is usually attached to the tank’s central overflow tube. After separating it from the tube, release the chain from the flush lever. It will help you install the new flapper correctly if you pay attention to how it is attached. Keep track of any damage or wear on the old flapper, as this might help you identify typical problems in the future.
Furthermore, examine the state of the chain and the connecting clips; these components may also require replacement due to wear and tear. To ensure that the replacement flapper fits as smoothly as possible, make sure that all pieces are removed completely, leaving no components or debris behind.
Clean the Flapper Seat
In order to make a seal, look at the flapper’s seat, which is where it rests. To ensure a tight seal with the new flapper, remove any build-up, silt, or debris with a clean sponge. Cleaning this area thoroughly is important as even little particles can interfere with the new flapper’s ability to seal, which could cause leaks.
Since limescale and mineral deposits are widespread in locations with hard water, they should be closely inspected since they can greatly affect the seal’s efficacy. If required, apply a gentle cleansing solution to assist get rid of tough deposits; just make sure to rinse well afterwards. After cleaning, a visual examination can assist in verifying that the surface is obstruction-free and smooth.
Attach the New Flapper
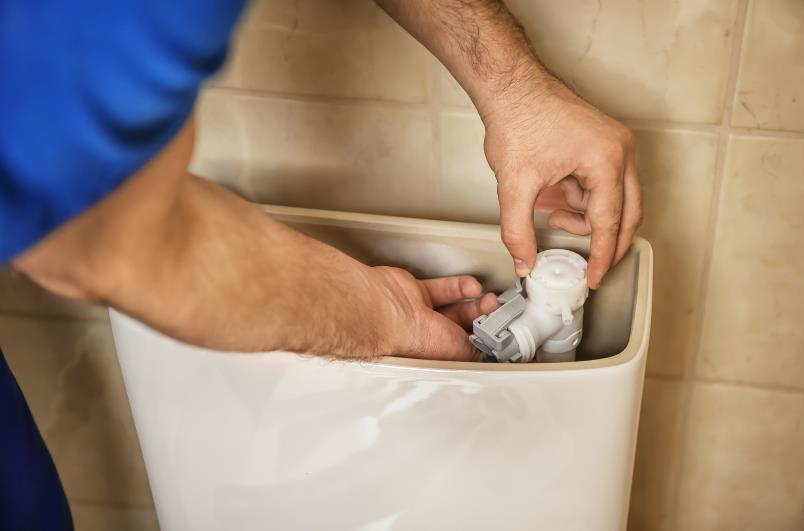
Attach the new flapper securely to the overflow tube. Make sure the chain is attached to the flush lever with enough space to enable the flapper to open fully during a flush, but not so much that it obstructs the flapper’s ability to seal properly when the toilet is not in use. For best results, gently adjust the chain to find the ideal balance. To guarantee a good seal, make sure the flapper is centered and equally rests on the valve seat. Once the chain is attached, manually lift the flapper to imitate a flush to check the length and make sure it can lift all the way and return to a complete seal without any obstructions.
If adjustments are needed, make minor changes to the chain link settings until the action is smooth and the seal is secure. It’s important that the flapper moves freely without sticking or binding, which ensures consistent performance and avoids running toilets or incomplete flushes.
Test the Flapper

After replacing the flapper, rotate the valve counterclockwise to restart the water supply. After letting the water tank fill up again, run several flush tests. Make sure the new flapper opens and shuts properly by watching how it operates. Look for any indications of drips or leaks. To ensure that the flapper reliably creates a tight seal and functions as intended without any problems, repeat the flush test multiple times. After the tank has been filled again and the toilet has settled, listen for the sound of water flowing; persistent sounds may indicate a gradual leak. In addition, consider adding a few drops of food coloring to the tank water. If the color seeps into the bowl without a flush, this is a clear sign that the flapper is not sealing properly and may need further adjustment.
Conclusion
With a new flapper installed, your toilet should be running more efficiently. Replacing a toilet flapper is an easy DIY task that can save water and reduce your utility bills. By following these steps, you can ensure that your toilet operates smoothly and remains leak-free. This project not only helps in maintaining your home but also in understanding the basic functioning of everyday appliances.
FAQs
How do I know if my toilet flapper needs replacing?
Common signs include the toilet running intermittently or constantly, a need to jiggle the handle to stop the water, or hearing water flow into the toilet bowl between flushes. These symptoms usually indicate a worn-out or damaged flapper.
What type of flapper do I need?
Toilet flappers can vary based on the toilet model. It’s important to check the size and type that match your toilet’s specifications. Universal flappers are available, but checking compatibility is key.
How often should I replace my toilet flapper?
Typically, a toilet flapper should be replaced every 3 to 5 years, depending on the quality of water and frequency of use. Hard water may shorten the lifespan due to mineral build-up.
Can I replace a toilet flapper on my own?
Yes, replacing a toilet flapper is a simple DIY task. With basic tools like gloves and a sponge, and a new flapper, most homeowners can complete this task without professional help.

