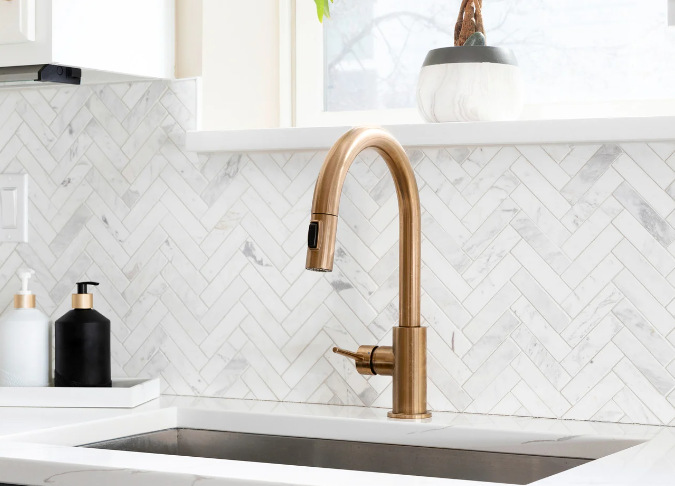
Adding a backsplash in your kitchen or bathroom boosts both style and function. It’s a great project for DIY lovers or first-timers. This guide will give you detailed information about how to install backsplash.
Key Takeaways
- Measure the wall to determine the square footage and amount of tile needed.
- Prepare the wall by removing appliances and cleaning the surface.
- Consider using backer board for added durability and moisture protection.
- Pre-lay the tile to plan the layout and make any necessary cuts.
- Prepare the mortar according to the package instructions.
How to Install Backsplash; the Nine Easy Step
1. Measure Wall
To start a backsplash project, you must measure the wall correctly. This step helps figure out how much tile you’ll need. Here’s what you do:
- First, measure the wall’s height and width carefully.
- Remember to measure around outlets, switches, or anything else on the wall. Note their sizes and where they are.
- If needed, section off parts like above the stove or sink.
- Multiply the height by the width to find the area of each section.
- Add the areas of all sections to get the total wall space.
- Always include 10% more for cuts, waste, and any fixes later on.
Getting the wall’s measurements right is key to not buying too little or too much tile. Good measurements help budget well and make installing easier.
2. Before You Start
Before you start, make sure your workspace is ready. Taking these steps will help you prepare for installation and set the right scene for work.
Remove Appliances and Clear the Countertop
Take off any appliances or cookware from the countertop. This step makes a free space to work and avoids damage to your things. You should also slide the stove out a bit. This makes it easier to lay the tiles.
Unplug the stove to stay safe as you work.
Protect Surfaces
It’s key to shield the countertop and backsplash. Use a drop cloth or cardboard to guard them from mess and from contact with glues and tools.
Be sure to tape off the countertop and backsplash well to keep them safe.
Shut Off Power
Turn off the power before working near outlets or switches. Find the right circuit and cut the power to avoid accidents in your work area.
For more safety, take off the cover plates of the outlets and switches.
| Steps | Actions |
|---|---|
| 1 | Remove appliances and cookware from the countertop. |
| 2 | Move the stove slightly away from the wall for easy tile placement. |
| 3 | Disconnect the stove from the power source for safety. |
| 4 | Cover the countertop and backsplash with a drop cloth or cardboard. |
| 5 | Tape off the existing countertop and backsplash to protect them. |
| 6 | Shut off power to nearby electrical outlets and light switches. |
| 7 | Remove the cover plates from outlets and switches. |
3. Prepare Wall
Before you start, it’s crucial to get the wall ready. This ensures a strong and smooth backsplash. Let’s look at the steps:

Remove Old Grout
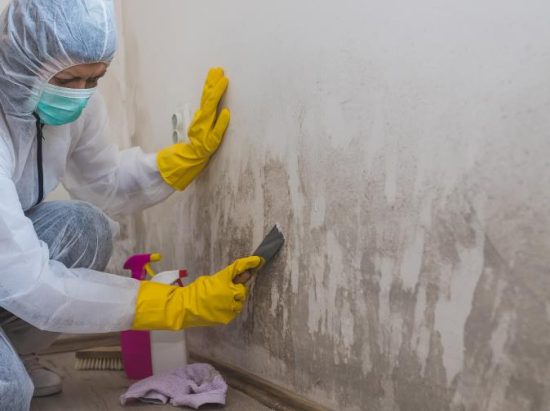
If there’s old tile, take out the grout between them first. Use a grout scraper or a small tool. Be careful and make sure the surface is clean for the new tiles.
Clean the Surface
Now, clean the wall well to get rid of dirt and debris. Normally, soap and water work. But for greasy walls, use a degreaser. Clean with a sponge, rinse, and let it dry before the next step.
Repair Holes
Check the wall for holes or damage. Fill them with spackling paste using a putty knife. Smooth it out and let it dry. Then, sand it for a shiny, flat look.
Taking these steps ensures your backsplash will last and look great. Next, you can move on to installing the backer board if needed.
4. Install Backer Board (Optional)
Adding backer board can make your backsplash tougher against wear and moisture. It’s not a must, but it does offer a strong, flat surface for your tiles. This makes your installation look professional and last for a long time.
Here’s how to put up backer board if you go that route:
- Remove the Drywall: First, take off the drywall. This step is key for a smooth, even base.
- Press and Secure: Fit the backer board snugly against the wall. Fasten it to the wall studs with screws, spacing them every 6 to 8 inches.
- Leave a Gap: Keep a small gap between each board to let it expand without warping. Caulk this gap to keep water out.
- Apply Fiberglass Mesh Tape: Strengthen the board’s seams and corners using fiberglass mesh tape. This stops cracks from appearing.
- Cover with Mortar: Next, put a coat of mortar over the tape. This creates a level, sturdy base for your tiles to stick to.
Following these steps will help your backsplash look great and hold up well over time. The backer board adds protection and strength, ensuring your tiles stay in place beautifully for years.
5. Pre-Lay Tile
Before putting down the tile, laying it out on the wall is key. It helps ensure it’s in the right spot and straight. This makes the backsplash look good in the end and helps fix any issues early.
To pre-lay the tile:
- First, mark the start and end spots on the wall for the tile. It guides you during placement.
- Next, use a straightedge to keep the spaces between tiles even. This makes the backsplash look nice and neat.
- Then, mark with a pencil where each tile will go. This helps you stay organized when installing.
By setting up the tile first and marking where to begin, you’re better off. You avoid some typical mistakes and get a more pro-looking result.
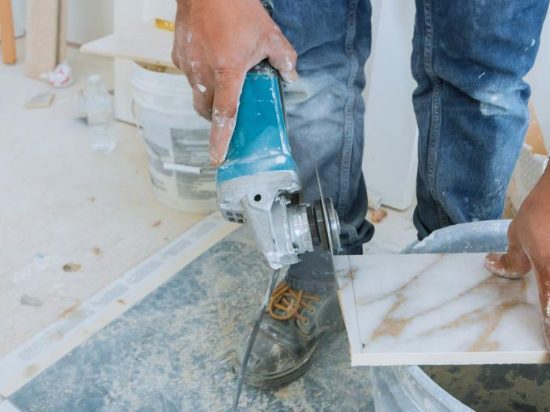
6. Cut Tiles

When putting in a backsplash, you might need to cut some tiles. Doing this right takes good tips and tools. Here’s what you need to make those perfect cuts:
1. Tile Cutter: A tile cutter is great for porcelain or ceramic tiles. You make a mark, then snap the tile cleanly along that line.
2. Tile Nipper: If you have to cut circles or take off small parts, use a tile nipper. It helps you carefully cut until you get the shape or size you need.
3. Wet Tile Saw: When working with natural stones, a wet tile saw is best. It has a diamond blade and uses water to cut precisely. This gives you smooth and accurate edges.
Always check the manual for how to use these tools correctly. Make sure to measure well and mark the tile before cutting. With the right tools and steps, your backsplash will look flawless.
7. Prepare Mortar
Getting the mortar ready is key before you start installing tiles. To make sure the tiles stick well, you need to use the right method and materials. Here’s how to do it:
- First, look at the thin-set mortar package. Each brand might tell you something a bit different. Make sure you follow the instructions on mixing and ratios carefully.
- Put water in with the mortar powder slowly in a bucket. Use a trowel or mixer to blend it. Keep adding water and mixing until it’s smooth but not too thin or thick.
- After mixing, give the mortar 5 to 10 minutes to rest. This time lets the chemicals in it start working, which helps the tiles stick better.
- Mix the mortar one more time after it’s rested, but don’t add more water. This step evens out everything in the mix.
- Remember, the mortar has a time limit for how long you can use it. After it starts getting hard, it won’t stick the tiles as well.
- You can skip the mixing part by using a tile setting mat for a faster job. These mats stick to your wall, and you put the tiles on them directly.
- Pick a mortar color that goes with your tiles. There are many colors available to match your tile’s style. This choice can make your tiling look great.
Getting the mortar mix right means your tiles will stay up for a long time. Mix carefully and stick to the instructions to get the best outcome.
| Mortar Preparation Steps |
|---|
| Read the instructions on the thin-set mortar package |
| Gradually add water to the mortar powder and mix thoroughly |
| Let the mixture stand for 5 to 10 minutes |
| Mix the mortar again without adding more water |
| Use the mortar within the specified time frame |
| Consider using a tile setting mat for quicker installation |
| Choose the appropriate mortar color for your tile |
8. Apply Mortar
Applying mortar is key in installing a backsplash. It makes the tiles stick well and gives them a solid base. Here’s how you apply it the right way:
- Choose the right notch trowel for your tile size. The notches control how much mortar you use.
- Spread a thin layer of mortar on the wall at a 45-degree angle. This thickness and angle are best for the tile to stick well.
- Push the tile into the mortar firmly. It should fully touch the wall. This makes the tile and wall bond strong.
- Use the notched side of the trowel to make smooth ridges in the mortar. It prepares the surface for the tile to sit evenly.
- Wipe off extra mortar from the tile with a wet sponge. But, be careful not to move the tiles or the fresh mortar too much.
Getting the mortar layer right is crucial for a good backsplash. Doing this well leads to a finish that looks expert and lasts a long time.
| Tools | Materials |
|---|---|
| Notch trowel
Trowel cleaner Bucket Sponge |
Mortar
Tile Tile spacers |
9. Grout & Seal
After placing the tiles, apply the grout according to the instructions. You can use sanded or unsanded grout, depending on the gap size. Choose the one that fits the job best.
Once the grout is on, clean excess grout with a damp sponge. This step stops grout haze. It makes sure your backsplash looks clean and shiny.
Let the grout dry completely before sealing it. Sealing helps avoid stains over time. It keeps your backsplash looking new longer.
At the end, use caulk to fill the space between the backsplash and the countertop. This seals the area against water. It also gives your backsplash a polished, pro look.
Conclusion
Fixing a backsplash is a rewarding DIY project that can significantly increase the look and functionality of your kitchen or bathroom. With the right tools, materials, and planning, you can change a plain wall into a stunning home feature. Remember, choosing the suitable materials that complement your interior design is critical, as it increases the complete aesthetic appeal of your kitchen or bathroom. Whether you’re updating your kitchen or adding flair to your bathroom, the effort you put into installing a backsplash will pay off with aesthetic appeal and increased durability. By following the steps outlined in this guide, you can make sure a smooth installation process and enjoy the satisfaction of a job well done.
FAQs on Installing Backsplash
How to Install Backsplash Tile Sheets?
To install backsplash tile sheets, measure and prepare the wall, then dry fit and cut the tile sheets as needed. Apply thin-set mortar or adhesive with a notched trowel, and press the tile sheets firmly onto the wall, ensuring they are aligned and level. After the adhesive sets, apply grout between two tiles, remove excess with a damp sponge for a clean finish.
How to install the backsplash behind the stove?
To install a backsplash behind a stove, first ensure the wall is clear from debris, dry, and smooth, then apply tile adhesive, set your tiles or tile sheets in place, and use a level to keep lines straight. After the adhesive dries, apply grout between the tiles, then seal it to protect against heat and moisture.
How to install a backsplash on the drywall?
To install a backsplash on drywall, ensure the drywall is clean, smooth, and primed or painted to improve adhesion. Apply a thin-set mortar or adhesive with a notched trowel directly onto the drywall, then position your tiles or tile sheets, pressing them firmly into place. Once the adhesive has been set, apply grout between the tiles and seal the grout to protect against moisture and stains.

