Are you planning to upgrade and install a new toilet or replace your old one? Whether you’re a seasoned DIY enthusiast or a newbie trying to save money on plumbing services, fear not! Installing a toilet may look like a difficult task, but with the proper procedure, it can be very easy. Here are ten step-by-step guides on how to install a toilet like a professional at a very affordable cost.
Understanding the Basics: Preparing for Installation
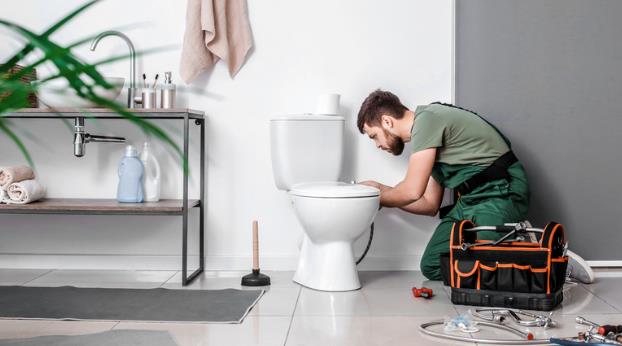
Before diving into the installation procedure, it is vital to bring all of the necessary equipment and substances. For the installation of the toilet, you have to gather all the necessary things, such as tools like a screwdriver, a putty knife, a wrench, gums, etc. You also have to make sure you bring a brand-new toilet that includes a tank, bowl, seat, and wax ring. Additionally, you’ll want to close off the toilet water supply.
How To Install A Toilet?: A Step-by-Step Guide
Step 1: Prepare the Area
Start by ensuring the toilet floor is clean and free of debris. Place a towel over the drain to save any objects from falling in during the installation procedure. Next, find out the bathroom flange (the pipe that connects the restroom to the drainpipe) to make certain it is in good condition. If vital, repair or update the flange to make sure it is a steady fit for the brand-new restroom.
Step 2: Position the Toilet
Positioning the toilet properly is essential for a perfect installation. Carefully place the toilet over the flange, making sure that the bolts align with the holes in the bottom of the restroom. Check thoroughly; the toilet has to be set evenly. Make any important changes, including shims beneath the bottom, to obtain a degree position. Once the toilet is properly positioned, continue securing it to the ground and connecting the water delivery.
Step 3: Install the Wax Ring
After positioning the toilet properly, install the wax ring correctly. The wax ring can help create a watertight seal between the toilet and drain pipe. To fix the wax ring, gently press it onto the bottom of the toilet outlet, where the drainage pipe starts, and make sure it tightens well. Otherwise, it may cause a leak.
Step 4: Secure the Toilet
Now the toilet is positioned and the wax ring connected. It’s time to secure the toilet carefully. For that, slowly lower the toilet flange and make sure that the bolts are protruded through the holes. After fixing, secure it tightly with bolts. While tightening don’t over tighten the bolts, otherwise, it could crack the porcelain.
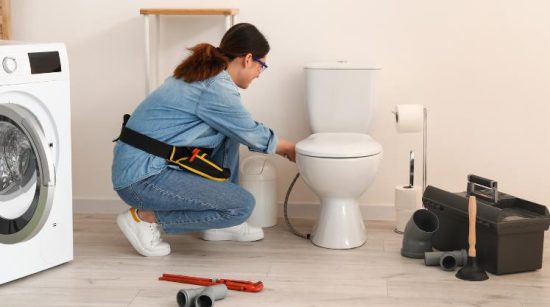
Step 5: Connect the Water Supply

Now the toilet is fixed, and you can reconnect the water supply. Before that, check if there are any leaks or breakages. Turn the water supply on and allow it to fill for checking. After the water fills the tank, flush the toilet for checking. Once you make sure that there are no leaks, the first five steps are successfully completed.
Step 6: Installing a Toilet Flange
The toilet flange can be installed before or after the toilet is placed. To fix the toilet flange, clean the area around the drainpipe and position the flange over the pipe. Secure the flange by using screws or bolts to tighten. After completing the toilet flange fixation, you can move on to the next step.
Step 7: Caulk the Base (Optional)
By caulking the base of the toilet, you can give your toilet more stability and a finished look. For that, you can apply a bead of waterproof caulk around the toilet base. This helps to prevent water and debris from entering the toilet. This also makes it easier.
Step 8: Test for Leaks
The major installation process is now complete. It’s time to identify any mistakes in the installation process. For this, inspect every point for any signs of leaks or improper positioning. Check the water connections, supply link, and base of the toilet. If you find any leaks, reapply the wax ring as needed.
Step 9: Secure the Toilet Seat
Attaching the toilet seat to the toilet is the second last step. The seat is the most important part of the toilet for comfort. So, test the seat to make sure it opens and closes smoothly. So, the toilet seat is regularly used, and any damage can affect the successful installation of the toilet.
Step 10: Clean Up
The final touch of the toilet installation is cleaning up. It’s important to dispose of the waste properly and tidy up the toilet. For this, remove the water and dirt accumulated during the installation process. The cleaning of the toilet is as important as the toilet installation. It looks great when the cleaning is over and it is ready to use. Here, fill the toilet space with essential things like tissue, a bucket, etc.
In the end, installing a toilet may also look like a frightening assignment, but with the proper steps and a little patience and perfection, it’s absolutely viable for even the most novice DIYers. By following the ten important steps mentioned in this manual, you may be well on your way to studying the art of toilet setup. So roll up your sleeves, gather your tools, and get equipped to give your toilet a much-wanted upgrade!
FAQs on how to install a toilet
1. Can I install a toilet myself, or should I hire a professional plumber?
Installing a toilet and saving money may interest everyone. However, the important thing is to consider your level of skill and comfort with plumbing tasks. It is not an easy task to install a toilet. If you are unsure, always prefer to hire a professional plumber.
2. How long does it take to install a toilet?
The time will depend on your level of experience in plumbing and installation, including fixing the water supply, rechecking the installation, and determining the final cleaning needs. If you are planning to fix a toilet with more facilities and options, it can vary. On average, a straightforward installation can be completed in 1 hour.
3. What tools do I need to install a toilet?
You’ll need basic tools such as a wrench, screwdriver, level, putty knife, bucket, and rag. Additionally, you’ll need a new toilet (including a tank, bowl, seat, and wax ring) and possibly shims or caulking for adjustments and finishing touches.
4. How do I know if my toilet flange needs to be replaced?
The main signs of needing to replace the toilet flange is the damage and corrosion. If Additionally, if any leak happens is an indicator for the flange to change. Any suspect or issue with flange, it’s good to be inspected by a professional plumber.
5. What should I do if I encounter a leak after installing a toilet?
If any leaks happen even after the installation, check all connections and bolts. You have to securely tighten all the connections. Even after the tightening, the problem persists, and it is better to contact a professional.