The installation of flanges has a crucial role in toilet plumbing. The toilet flange is the pipe that connects the toilet to the bathroom floor. Usually, leakage in the toilet floor from the base is a sign to replace your toilet flange. Additionally, setting the flange is important in the installation of the toilet. This can seem complicated and skilled, but every person can install the flange at home through certain steps and tips. However, in some cases, seeking professional assistance will be better than doing it yourself.
Here are the step-by-step instructions on how to install a toilet flange properly. I will also let you know about the necessary tools for it.
The Importance of a Properly Installed Toilet Flange
A securely set-up toilet flange is crucial for retaining your toilet firmly in its location and forming a watertight seal with the waste pipe. This seal is essential for stopping leaks and maintaining the structural integrity of your bathroom floor. A nicely mounted flange may prevent water damage and instability in your bathroom. Ensuring the flange is securely connected and placed effectively is the final chapter of the toilet setup. Investing money and skills to secure the flange can ensure the proper functioning and safety of toilets.
Common Issues with Toilet Flanges
Improperly fixed toilet flanges can bring about many problems, including leaks, unstable toilets, and difficulties securing the toilet in the vicinity. These issues can compromise the functionality and safety of your lavatory. It is important to identify these issues early on to prevent them from escalating into more vast matters. Regular inspections and maintenance can assist in capturing any capacity troubles with the bathroom flange before they worsen. By addressing those troubles promptly, you can ensure the proper functioning and stability of your bathroom.
Tips for Troubleshooting
When installing a lavatory flange, situations like misaligned pipes, stubborn bolts, or damaged flanges may also arise. These limitations can obstruct the installation process and cause frustration. By understanding how to tackle commonplace troubles, you can successfully complete the task.
Safety Precautions
Working on plumbing projects seems like a simple task, but it requires certain precautions. These may additionally include carrying defensive tools, turning off water and electricity assets, and running in a well-ventilated region to keep away from inhaling dangerous fumes. For example, think like a plumber, you have to deal with the electricity, water, chemicals and also the dirt. So be alert to deal with such matters. Prioritizing safety ensures a successful and coincidence-unfastened set up system.
Tools Needed for Installing a Toilet Flange
Before getting started, gather the following tools:
- Adjustable wrench: It is used to tighten and loosen bolts and nuts.
- Plumber’s putty: Mixture of linseed oil, powdered limestone, and other inert filler used to seal.
- Hacksaw: For cutting pipes to the required length.
- Screwdriver: To tighten the screws and bolts.
- Toilet flange: Ensure you have the correct size and type to install your flange.
Having these tools on hand will make the installation process much smoother.
How to Install a Toilet Flange?
Follow these steps to install a toilet flange properly:
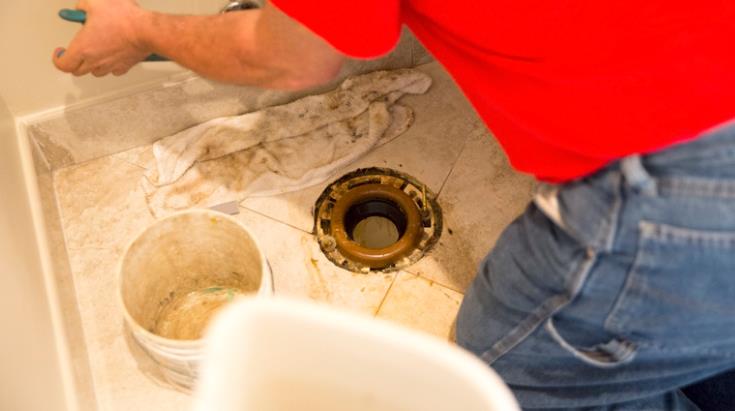
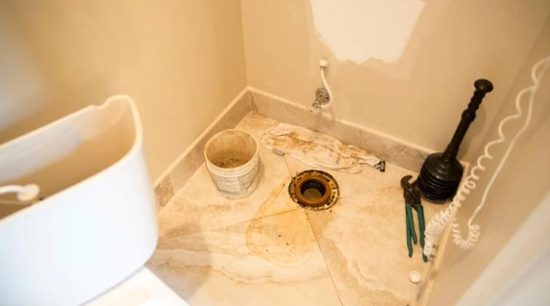
- Prepare the Area: First, turn off the water supply to the toilet. If the flange has to be replaced, remove the old toilet. Clean the Area around the flange to make the surface installation clean.
- Drill the floor: The floor will mostly be concreted. So for the placement, it has to drill and make space. Drilling machine can be used for this, and after that, the breakage in the floor can be solved by closing the edges with cement.
- Position the Flange: Place the new lavatory flange over the waste pipe, ensuring it sits flush with the ground. Use a level to confirm that the flange is placed efficiently.
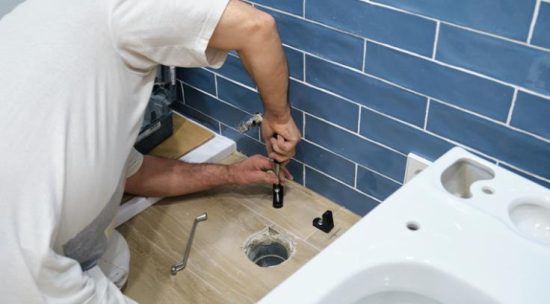
- Secure the Flange: Once the flange is in the right position, tighten it to the floor using nuts and bolts. Make sure the flange is firmly attached and doesn’t loosen.
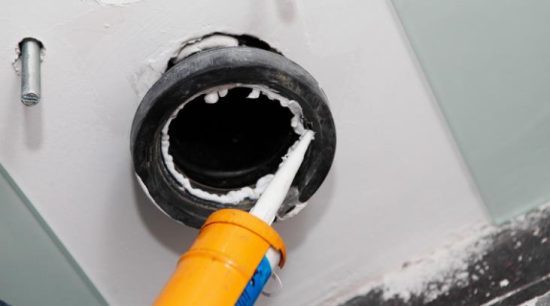
- Connect the Pipes: These steps deal with the connection of the waste pipe to the flange using PVC cement. Sometimes, rubber gaskets can also be used instead of cement. By using a hacksaw, the pipe can be cut to the length needed.
- Seal the Flange: This will be the final step of the process. The silicone sealant can be applied around the base of the flange to create a watertight seal.
Common Mistakes to Avoid
While installing a toilet flange, avoid the following mistakes:
- Incorrect Positioning: Proper positioning of the toilet flange is important to prevent leaks and make sure stability. If the flange isn’t aligned efficiently with the waste pipe, it may result in incorrect sealing and instability in the restroom. Taking the time to make certain accurate positioning decisions in the course of installation will assist in avoiding ability problems in destiny.
- Over-Tightening Screws: While it’s vital to secure the flange’s firm weight, tuning screws may have detrimental consequences. Excessive force can cause harm to the flange itself or the underlying ground, leading to structural problems. It’s important to tighten screws securely, however, with caution to avoid causing damage.
- Using the Wrong Size Flange: Make sure you have the correct size flange for your toilet and waste pipe.
- Skipping the sealant: Skipping the use of a plumber’s putty or sealant can result in leaks and water damage.
Conclusion
Installing a toilet flange is an essential issue of plumbing maintenance, ensuring the steadiness and capability of your restroom. A properly set-up flange and a watertight seal with the waste pipe prevent leaks and structural damage to your bathroom floor. By following the steps mentioned and using the vital tools, you can correctly set up a toilet flange at home. However, if you come across demanding situations or feel uncertain, searching for expert assistance is continually a feasible choice to make sure the activity is performed effectively.
FAQ on how to install a toilet flange
1. What are the signs that indicate the need to replace a toilet flange?
Leakage around the base of the bathroom, instability of the toilet, and harm to the flange are commonplace symptoms that endorse the need for a substitute.
2. Can I set up a toilet flange by myself, or do I need to search for expert help?
While the setup process can be completed by following the provided steps, searching for professional assistance is beneficial if you stumble upon problems or are unsure about the task.
3. What protection precautions do I have to take while putting in a toilet flange?
Prioritize protection by carrying shielding tools, turning off water and electricity sources, and running in a properly ventilated location to keep away from inhaling risky fumes.
4. What equipment do I want to put in a bathroom flange?
Essential gear consists of an adjustable wrench, plumber’s putty, hacksaw, screwdriver, and the perfect restroom flange on your installation.
5. What are common mistakes to avoid throughout the restroom flange installation?
Avoid wrong positioning, over-tightening screws, using the incorrect size flange, and skipping using sealant or plumber’s putty to prevent leaks and ensure a steady setup.