Introduction
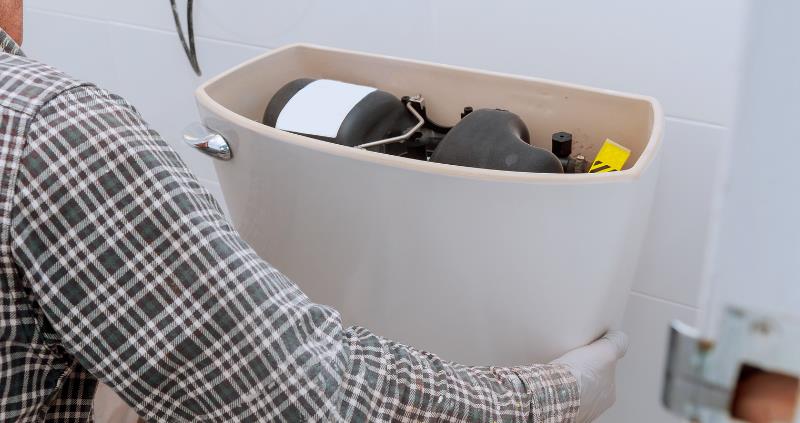
Maintaining a tidy home entails paying attention to all aspects, including those that are only sometimes visible. The portion of your toilet that stores water until it is flushed is called the toilet tank, which is one frequently overlooked region. Maintaining this space clean is essential for both the effectiveness of your toilet and the general hygiene of your bathroom. Cleaning the toilet tank can help extend the life of your plumbing and improve air quality in one of your home’s most regularly used rooms. Here’s how to clean toilet tank correctly to maintain its optimal performance and hygiene.
Why We Clean Toilet Tanks?
Cleaning the tank behind your bathroom vanity prevents mold and bacteria from growing. These unwanted visitors can produce foul smells and create health dangers since they flourish in damp settings. Moreover, hard water sediment and mineral deposits might build up inside the tank, compromising the operation of its mechanical parts. Regular cleaning keeps these deposits from harming the flushing system, which can result in costly repairs.
Additionally, a clean toilet tank contributes to more efficient water use. When the tank is free of debris and buildup, the flushing system operates smoothly, using the correct amount of water with each flush. This ensures a cleaner flush and conserves water, aligning with environmentally friendly practices and potentially lowering your water bill.
How Often Should I Clean the Toilet Tank?
Cleaning your toilet tank at least once a year can help to keep it clear of dangerous bacteria and mineral buildup and ensure optimal operation. To prevent the quicker accumulation of minerals, you may need to increase this frequency if your home has hard water. Finding the ideal cleaning plan for your home might be aided by checking the tank once every few months for indications of mold or accumulation.
Monitor the water quality and any visible particles or discoloration in the tank to fine-tune your cleaning schedule. These factors may indicate that more frequent cleanings are necessary. The increased frequency of flushes in homes with more people or bathroom usage can accelerate the growth of silt and germs, requiring more frequent maintenance.
For those using healthy water, which often contains a higher mineral content, inspecting and cleaning the toilet tank quarterly may be necessary to prevent operational issues. Lastly, routine cleanings are also an excellent opportunity to check for leaks and the condition of components like flappers and valves, ensuring everything functions as intended.
How to Clean Toilet Tank Properly Like a Pro?
Step 1: Gather Your Cleaning Supplies
Ensure you have the following supplies before cleaning: white vinegar, rubber gloves, a scrub brush or sponge, and a disinfectant. Because white vinegar is acidic, it works well as a natural cleaning agent by killing bacteria and dissolving mineral deposits. It is essential to use a gentle sponge or a scrub brush with tough bristles to clean the buildup without causing any damage to the interior of the tank. Rubber gloves will shield your hands from contaminants and the effects of cleaning agents. To prevent corroding any metal parts, use a disinfectant suitable for use in toilet tanks. Keeping these materials on hand will facilitate cleaning while guaranteeing efficiency and safety.
Step 2: Turn Off the Water and Flush the Tank
To stop more water from entering the tank while cleaning, locate the water valve, which is usually located behind the toilet, and turn it off. To empty the water from the tank, flush the toilet once after turning off the water. This is a crucial step because it reduces the water level, which makes it easier to reach the areas where dirt collects on the tank’s sides and bottom. For the cleaning agents to function correctly, you must guarantee that you are operating in a primarily dry atmosphere by flushing the toilet at this point. This also keeps cleansers from becoming diluted and preserves their effectiveness against deposits and stains.
Step 3: Apply Vinegar and Water Mixture
Pour a one-to-one solution of white vinegar and water into the empty tank. The vinegar’s acidity successfully breaks down lime and other typical mineral deposits in toilet tanks. Let this solution sit overnight for a few hours if the buildup is quite alarming. The vinegar has plenty of time to penetrate and dissolve the deposits and any developed bacterial film thanks to this extended exposure. It is best to take your time soaking so that the solution has time to do its job and reduces the amount of subsequent scrubbing that will be necessary, potentially saving the inside surfaces of the tank from harm.
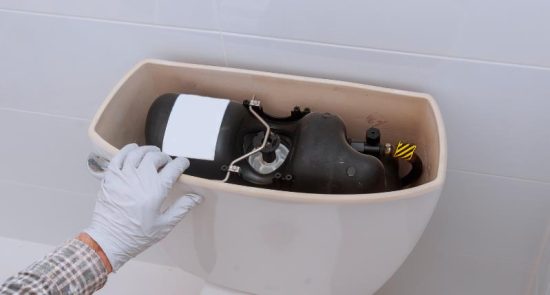
Step 4: Scrub the Tank
After the vinegar solution has had time to soak, put on your rubber gloves and you can use the scrub brush or sponge to scrub the interior of the tank. Focus on areas with visible buildup, such as the waterline and the corners of the tank, where sediment tends to accumulate. Gently scrub the tank walls and bottom to remove all traces of grime and deposits. This step may require some elbow grease, especially in areas with heavy buildup. Be thorough and also gentle to avoid damaging the tank’s components.
Step 5: Rinse the Tank
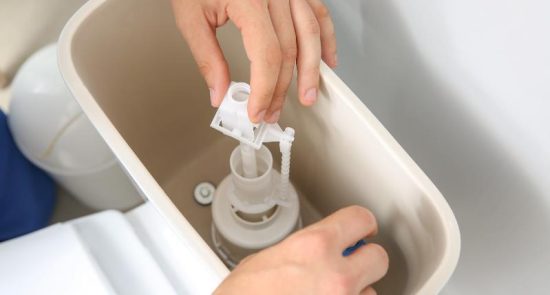
Reopen the water valve to refill the tank after you’ve given it a thorough cleaning. To rinse off the cleaning solution and any loose debris, flush the toilet multiple times. The tank will be left clean and fresh after this flushing procedure, guaranteeing that all vinegar and loose mineral particles are removed. Keep an eye on the water quality throughout these flushes; it should notably improve after a few. During this rinse step, make sure everything is operating as it should. This is also an excellent time to check for any operational problems that may have arisen after cleaning.
Tips to Maintain the Tank Clean
- Periodically test the hardness of your water to manage mineral buildup more effectively.
- Use mild detergents or a diluted vinegar solution for routine maintenance to prevent harsh chemical damage.
- Regularly wipe down the tank lid to keep dust and debris from contaminating the water.
- Steer clear of cleaners that contain bleach or ammonia to avoid damaging tank components.
- Inspect the tank regularly for leaks or malfunctioning parts to catch issues early.
- Minimize unnecessary flushes to reduce the frequency of water exposure and sediment accumulation.
- Educate all household members on what should not be flushed down the toilet to prevent blockages.
- Consider installing a tank liner if you live in an area with severe hard water to protect against corrosion and buildup.
Conclusion
It’s important to remember to keep your toilet tank clean as part of good household hygiene. Your toilet can function well and stay clear of dangerous bacteria and buildup with proper maintenance and care. Consistency and the appropriate cleaning materials are essential for a well-maintained toilet tank. Frequent maintenance improves the hygiene and security of your bathroom environment and extends the life of your toilet’s components. You may maintain the best possible condition for your toilet for many years by following these easy rules.
Related Articles:
- How to Clean a Toilet and Disinfect It Easily?
- How Do You Snake a Toilet for Overflow and Clog?
- How to Fix a Running Toilet?
FAQs on how to clean toilet tank
Can I use the bleach to clean my toilet tank?
It’s best to avoid using bleach in your toilet tank, as it can corrode metal parts and degrade rubber seals over time.
How do I remove stubborn mineral deposits?
For tougher stains, apply a stronger concentration of vinegar and let it sit overnight before scrubbing.
Is it safe to clean the toilet tank with household cleaners?
While many household cleaners are effective, they must be safe for use in toilet tanks to avoid damaging the internal components.
What should I do if I notice a leak after cleaning my tank?
Inspect the components or dirt for damage and replace any degraded parts. If the leak persists, consider consulting a professional plumber.
How can I prevent mold in my toilet tank?
Regular cleaning and ventilation can help prevent mold growth. Additionally, keeping the lid closed and using a dehumidifier in the bathroom can reduce moisture levels.