Have you ever wondered how to build a door and add a personalized touch to your entryway? Embrace the challenge of DIY door construction and craft a charming Dutch door that melds functionality with irresistible character. Despite initial reservations about complexity and cost, you can navigate this rewarding journey step-by-step.
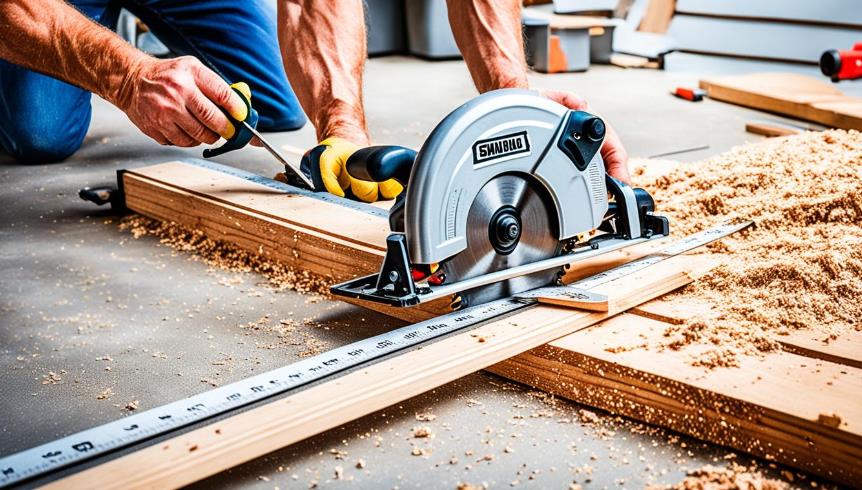
Begin by acquiring unfinished doors as a cost-effective foundation and gathering essential supplies such as pine boards, door hardware, and weather stripping. Equip yourself with tools like circular saws, routers, and paint applicators. The most daunting task, dividing the door into halves with precision, can be conquered with meticulous measurements, cutting guides, and steady saw techniques. Adding ledges will enhance both visual appeal and functionality, ensuring a perfect fit within the door frame and prepping for hardware installation with exact spacing and routing.
Follow these custom entryway design strategies to not only create a stunning and unique door but also to hone your carpentry skills. Ready to start your DIY adventure and transform your space ?
Understanding the Anatomy of a Door
When it comes to comprehending the door structure, recognizing the key components of a door is essential. Every door comprises several integral parts that work together to ensure its functionality and aesthetics. Let’s delve deeper into the primary elements that define a door’s anatomy.
Parts of a Door
The door structure typically consists of stiles, rails, and panels. The stiles and rails create the framework that holds the door panels in place. These components of a door are meticulously crafted to maintain the door’s integrity and performance.
| Component | Description |
|---|---|
| Stiles | Vertical elements located on the sides that provide primary support and endure most of the wear and tear. |
| Rails | Horizontal segments that join stiles at the top, bottom, and sometimes the middle to enhance structural stability. |
| Panels | Sections that fill the spaces between stiles and rails, adding both visual appeal and structural robustness. |
The Importance of Stiles, Rails, and Panels
Stiles and rails are fundamental to a door’s durability and style. While stiles form the primary framework, offering rigidity, the rails connect these stiles at critical points, ensuring the components of a door remain intact. The choice of materials for these parts influences the overall performance and longevity. Door panels, which nestle within this framework, can vary from solid wood to composite materials, each offering unique benefits. Understanding the door structure and selecting quality materials is crucial for creating a long-lasting and attractive door.
Materials You Will Need
Building a sturdy, custom door begins with selecting high-quality materials and acquiring the right tools. Whether you’re a seasoned woodworker or tackling your first door project, gathering the essential supplies is crucial for success. With attention to detail and careful craftsmanship, you can create a door that not only enhances the aesthetic of your home but also provides durability and security.
Choosing the Right Wood
For creating a durable door, hardwoods like maple or poplar are excellent choices due to their strength and stability. These woods are particularly favorable if you plan to paint the door. Avoid using softwoods or any moisture-rich lumber, as these materials are prone to warping. If budget constraints are a concern, consider materials like Masonite or MDF, which provide a stable and cost-effective solution for door panels. When selecting wood, ensure it is properly dried and acclimated to prevent future warping or twisting.
Tools and Supplies Checklist
To ensure you have everything needed for your door construction project, compile a comprehensive inventory of essential door building materials. Selection of woodworking tools, your door building project will be well-equipped to achieve professional results. Each tool and material has a pivotal role, ensuring that the construction process is smooth and the final product is both functional and aesthetically pleasing.
| Materials | Tools |
|---|---|
| Maple or Poplar Wood | Jointers |
| Masonite or MDF | Saws |
| Dowels | Routers |
| Hinges | Clamps |
| Weather Stripping | Sanders |
How to Build a Door from Scratch?

Embarking on the journey of custom door creation starts with meticulous planning and precise measurements. Ensure compatibility with your existing door frames by taking accurate measurements. Your material selection should consider not just aesthetic appeal but also durability, which is crucial in door construction methods.
Design your door with attention to the arrangement and dimensions of stiles, rails, and panels. These components should be uniformly squared to provide stability. Utilize doweling jigs and other woodworking tools to properly assemble the stiles, ensuring that they join seamlessly to achieve a solid structure. The rails should be sized accurately to maintain harmony in the design, avoiding any disproportion.
As you advance in your DIY door building project, the use of precise doweling techniques is paramount. This approach enhances the strength of your door, adding to its longevity. The rails and stiles, when connected properly, create a stable and aesthetically pleasing doorway that stands the test of time.
| Tasks | Tools | Tips |
|---|---|---|
| Measurement | Measuring Tape | Ensure accuracy for compatibility |
| Material Selection | Saw, Router | Choose durable materials |
| Joint Assembly | Doweling Jig | Maintain uniformity in joints |
| Final Assembly | Clamps | Ensure all parts fit perfectly |
1. Preparing and Measuring
Proper preparation and accurate measurements are the foundation of successful door construction. Ensuring a precise door fitting requires diligent attention to the details of the door frame measurement and door size calculation. Begin by thoroughly measuring the existing door frame, taking into account any necessary allowances for smooth operation.
Measuring the Door Frame
When performing the door frame measurement, use a reliable tape measure to determine the height, width, and depth. Measure both the width and height at multiple points—top, middle, and bottom—to account for any inconsistencies or warping in the frame. These dimensions will inform the door size calculation and ensure that the new door fits perfectly within the space.
Calculating Door Dimensions
Once you have the door frame measurements, you can calculate the dimensions for the new door. It’s crucial to subtract a slight margin, typically about 1/8″ to 3/16″, to allow for proper clearance and movement within the frame. This precise door fitting ensures that the door will open and close smoothly without any obstructions. If you’re installing a new frame, remember to include the frame’s width and potential adjustments due to shimming in your calculations.
Additionally, consider the thickness and material of the door, as these factors can influence the ease with which the door will fit and function. By meticulously following these steps and adjusting for precise measurements, you will facilitate a seamless installation process.
2. Building Rails and Stiles
Creating door stiles and rails is a fundamental part of the door-building process. This process focuses on fabricating door stiles to ensure they provide the structural support needed for a high-quality door. To achieve this, use accurate measuring and cutting techniques.
Constructing Stiles

Begin by selecting straight, sturdy wood for fabricating door stiles. Standard interior door stiles are usually 4 to 5 1/2 inches wide, ensuring the door’s stability and appearance. Carefully cut the wood to the required length, ensuring all stiles are square.
The correct measurements and cutting of stiles lay the groundwork for a successful door assembly. If you’re working with custom designs, adjust the width accordingly, keeping in mind the overall aesthetic and structural integrity of the door.
Connecting Rails
Next, focus on cutting and attaching door rails. These horizontal components connect to the stiles, providing additional strength and alignment. Begin by cutting the top, middle, and bottom rails to the appropriate lengths, typically considering the bottom rail as the most robust.
The middle rail, which is usually slimmer, contributes to aligning the door panels correctly. Ensure precise cuts and consider dry fitting the parts to confirm their alignment before final assembly.
| Component | Dimensions | Purpose |
|---|---|---|
| Stiles | 4 – 5 1/2 inches wide | Structural Support |
| Top Rail | Custom Length | Alignment |
| Middle Rail | Custom Length | Support |
| Bottom Rail | Custom Length | Robustness |
By implementing these woodwork techniques when fabricating door stiles and attaching door rails, you set a solid foundation for creating a durable and aesthetically pleasing door. Ensuring precision in your work will pay off as you proceed to the next steps of your DIY door project.
3. Creating Door Panels
When it comes to crafting door panels, selecting the right material is crucial to the overall aesthetics and durability of your door. One popular choice is MDF, celebrated for its stability, smooth surface, and cost-effectiveness. Using MDF door panels is particularly advantageous if you plan to paint the door, as its surface ensures a flawless finish.
Each panel should be carefully measured to fit snugly into the grooves within the rails and stiles. This attention to detail ensures that the panels are not only secure but also enhance the structural integrity of the door. Apart from MDF, other panel options for doors include solid wood, plywood, and various composites. Each material brings its unique attributes, whether it’s the classic charm of solid wood or the versatility of plywood.
4. Door Joinery Techniques
Mastering door joinery techniques can significantly impact the strength and longevity of your door. Employing effective door assembly methods is pivotal in ensuring structural integrity. Two crucial methods include using dowels for strong joints and routing grooves for precise panel placement.
Using Dowels for Strength
One of the most reliable door assembly methods involves the use of woodworking dowels. Dowels provide robust connections between the rails and stiles, enhancing the overall durability of the door. To achieve precise placement, a doweling jig can be instrumental. This tool ensures that holes are accurately aligned, promoting a sturdy and secure joint.
Creating Grooves with a Router
Incorporating routing techniques for doors is essential for creating grooves that accommodate door panels. A router can carve consistent grooves along the inner edges of the stiles and rails, laying a foundation for seamless panel installation. This process not only adds to the visual appeal of the door but also contributes to its structural integrity.
5. Troubleshooting Common Issues
Despite meticulous efforts, assembly obstacles can arise. Common issues such as misaligned hinges or uneven joints can disrupt the final fit of the door. Corrective measures may involve sanding uneven edges or repositioning components. Addressing these challenges promptly ensures your door functions smoothly and complements your space beautifully.
6. Finishing Touches: Doorknobs and Hinges
As the construction of the door nears its final stages, ensuring the precise placement of doorknobs and hinges is crucial for a functional and aesthetically pleasing finish. Proper installation of these elements not only enhances the door’s utility but also its visual appeal. Focusing on accurate drilling for doorknobs and precise door hinge placement, you’ll achieve the perfect final door touches that make all the difference.
Drilling for Doorknobs

For installing doorknobs, begin with meticulous measurements to ensure correct alignment. Commonly, the standard height for placing a doorknob is about 36 inches from the floor. Utilize a template to mark the spots before drilling, as this ensures uniformity. Select appropriate drill bits based on the doorknob specifications, and carefully drill the necessary holes for screws and latch components. This step completes the installing doorknobs process, making sure the knob and latch function smoothly.
Mortising Hinges
Accurate door hinge placement is vital for the door’s proper functioning. Start by marking the hinge positions—typically, hinges are placed about 7 inches from the top and 11 inches from the bottom of the door, with any additional hinges evenly spaced in between. Using a router or chisel, mortise the marked positions to the hinge depth, ensuring the hinges sit flush with the door edge. This prevents any protrusion that could hinder door movement. Once mortised, securely fasten the hinges to the door and frame to complete the final door touches.
| Element | Measurement | Tools Needed | Considerations |
|---|---|---|---|
| Doorknobs | 36 inches from floor | Drill, Template | Uniformity, Functionality |
| Top Hinge | 7 inches from top | Router, Chisel | Flush Mounting |
| Bottom Hinge | 11 inches from bottom | Router, Chisel | Proper Spacing |
7. Painting and Finishing
Achieving a polished look is the final step in your DIY door project, encompassing both primer and paint application. Utilizing the right door painting techniques ensures the durability and aesthetic appeal of your door, whether it’s installed indoors or outdoors. Start by selecting a high-quality primer tailored to your door’s material, be it wood or MDF. For wooden doors, sanding the surface smooth before applying the primer will enhance the quality of your finish.
When it comes to painting, employing brushes for intricate edges and rollers for flat panels provides a uniform coat. MDF door finishing requires special attention; choose a primer that promotes better paint adhesion, and meticulously fill all nail holes and sand edges until smooth. This approach not only improves the look but also ensures the durability of your work, making the door resistant to regular wear and environmental factors.
Applying a smooth, even coat of paint is crucial for a flawless finish. Consider using multiple thin layers, allowing adequate drying time between coats to prevent streaks. Your goal is to build a solid, consistent color across the entire surface. Proper finishing transforms raw materials into a functional and visually appealing entryway, embodying both practicality and artistry. Your efforts in mastering these finishing techniques ensure your door stands as a testament to your craftsmanship.
FAQs on Building a Door
How do I determine the size of the door I need?
Measure the breadth and height of the door frame opening. For interior doors, the standard width is 32 to 36 inches, and the standard height is 80 inches. Exterior doors may vary in size, so measure the opening very carefully to ensure a proper fit.
Can I customize the designs of my door?
Of course, you can customize the design of your door to suit your preferences and complement your home’s style. Add decorative elements like panels, glass inserts, or carving for a personalized touch.
How long does it take to build a door?
The time it takes to build a door can change depending on the complexity of the design and your skill level. Simple doors can be completed in a day or two, while more intricate designs may take several days or weeks.

