Did you know? People spend about a year looking for lost items, many in messy closets. Imagine turning that chaos into an organized space. You can make a custom closet that’s perfect for you. It’s a DIY that builds value and comfort into your home.
Ever thought about making a closet that fits your home and life? and you don’t know how to build a closet? This guide is for you. We’ll show you how to start and finish a diy closet. You’ll learn tips for more storage. By the end, your closet will work just how you want it to.
Are you ready to make your clothing area more organized? Or maybe you want a whole new closet. Let’s start this project together. Get your tools ready. You can make a storage place that stands out, all on your own.
Introduction to DIY Closet Building
Starting a DIY closet project is more than just making more space. It’s about getting your home in order in a way that matches your style and needs. You’ll learn why it’s good to make your own closet and what you need to think about to succeed.
Understanding the Benefits of Custom Closet Space
Custom closets help keep things organized and make life easier. They’re designed to fit your space perfectly, saving room and keeping things neat. Getting advice from a wardrobe construction guide will show you that a well-planned closet does more than store things. It also makes your home look better.
What You Need to Know Before Starting Your Project
Don’t jump into building your closet without thinking things through. You need to figure out what space you need, what your place can fit, and what you can afford. Here’s some advice to start you off:
- Measure the space you have carefully to avoid any mistakes.
- Look into different materials and tools. Pick the ones that work best for your design and needs.
- Set a budget that covers everything, including any surprises along the way.
Knowing a few carpentry basics can make a big difference. It’ll help you with things like cutting wood accurately and putting your closet together well.
Materials and Tools Required for Closet Construction
Starting a closet building project means getting the right materials and tools. This ensures your wardrobe lasts and works well. Here’s a list of what you’ll need for the perfect storage space.
- Plywood: Go for 3/4″ maple veneered plywood. It’s strong for the main parts.
- Solid Maple: Use solid maple for the edges. This makes your closet look complete.
- Wood Glue & Wood Screws: You need these to put everything together well.
- Dowels: They make joints in your closet extra sturdy.
- Water-based Polyurethane: This gives a clear protective coat. It also makes your closet look good.
Now that you have your materials, the right tools are key for an easier build:
- Table Saw, Circular Saw, & Miter Saw: These are for cutting wood parts with accuracy.
- Router: You need it for shaping the wood.
- Clamps: They hold the wood pieces tightly while you work.
- Random Orbit Sander: It’s for making all the surfaces smooth.
- Drill/Driver, Drill Press: Use these to make holes and put in screws.
- Plug Cutter: It’s great for making wooden covers for the screw heads.
- Angle Grinder: Use it for cutting metal bars for hanging your closet sections.
Don’t underestimate preparing before you start building a closet. Having all the essentials ready helps your project go smoothly. It also avoids any delays, giving you the best results for your closet guide. Starting a DIY closet project means you need the right stuff nearby. This ensures your custom closet turns out just like you want. Gather these items to make your design dream a reality.
Choosing the Right Plywood and Solid Wood for Shelves
The kind of plywood you pick matters a lot. Go for 3/4″ paint-grade plywood for both good looks and budget-friendliness. It takes paint well, perfect for your DIY closet.
- Plywood must be strong enough not to droop under your stuff.
- For extra strength and style, use solid wood strips for edge banding. They work better than iron-on strips.
Securing Quality Tools for Accurate and Safe Cuts
Good tools mean your cuts are right and your project is safe. Getting top-grade tools is a smart move. It means clean cuts, safety, and tools that last for future projects too.
- For long plywood sheets, a guided circular saw or a table saw is perfect.
- A miter saw is essential for exact crosscuts. It helps everything fit together well.
- Use a router to make dados. This will aid in setting up the shelf supports.
These top tools will make crafting your closet much easier. From cutting the first piece to the final build, using the right tools is key. They not only make work smoother but safer too.
Preparatory Steps: Removing Old Shelving and Patching Walls
The first big step in your closet renovation journey is preparing the area. Start by taking down old or unwanted shelves. You need to clear the way for your new, better-organized closet system. We’ll show you how to get your space ready for this big change.
- Clearing Out Old Fixtures: Start by taking down any old wire shelves or built-in units. This is a good chance to think about what you really need for storage. Make sure your new design fits your daily life well.
- Wall Preparation: After taking the fixtures out, you might see holes and marks left on the walls. Cover them with a wall filler like spackle. A smooth wall is important for installing new parts later on.
- Sanding: Let the spackle dry, then sand the filled areas. Sanding makes the wall smooth. It helps new paint stick well and makes the wall look professional.
- Patching: In older homes especially, you might find bigger wall damages. Take care to fix these problem spots well.
- Painting: Give the walls a new coat of paint. A neutral color can make a small closet feel bigger. The paint helps create a fresh start for your new closet setup.
- Baseboards: Save any baseboards you want to use again. Put them somewhere safe. You can put them back after your new closet system is up.
These steps are crucial for a closet renovation that lasts and looks good. Make sure you do everything right from the start. Rushing now might mean problems with your project later. Your closet’s new look should get the best beginning possible.
how to build a closet?- Laying the Foundation
Starting your custom closet begins with a sturdy base. This step is crucial for building the rest of your design. We will look at how to properly lay out and construct the base. This is key to making your closet strong and useful.
Designing Your Closet Layout for Maximum Storage
Making the most of your space requires careful planning. When planning your closet, think about what you need to store. Also, keep in mind the size of your room and how to use every inch of the closet wisely.
Remember to use the height of your room for more storage. You can add multiple levels for hanging clothes, shelves, and drawers. Always measure accurately to make sure your design fits perfectly.
Constructing a Sturdy Base from 2x4s
Next, it’s time to put your plan into action. Start by creating a solid base using 2×4 lumber. This base must cover the full closet area. It supports the closet’s weight and all that is stored inside.
Make sure this base is level and well attached. You may need to remove flooring to do this right. A level and secure base is vital for the rest of your construction.
Creating your custom closet is more than just making room. It’s about making a strong, high-quality storage that fits your home and life. Stay with us for more steps in crafting a closet just for you.
Assembling the Closet Structure Piece by Piece

Starting a DIY closet project can be thrilling but also needs focus. It’s important to follow the building tips closely for a strong closet.
Begin by sorting your pre-cut plywood. Make sure these pieces fit your design well. They are the base of your closet.
- Lay out all materials and tools. Ensure your workspace is clean and spacious enough to maneuver large panels.
- Apply wood glue to the edges of the plywood pieces to secure them before fastening with screws. This enhances the durability of the joints.
- Use construction screws to assemble each unit. For best results, pre-drill holes to avoid splitting the wood.
- Employ corner clamps to keep everything square and aligned while the glue dries. This is critical for maintaining the integrity of the structure.
If you’re putting the closet together in its final spot, some steps may be more complicated. Yet, it’s easier than moving heavy, finished parts. This on-site method is great for small spaces or if your workshop is tiny.
Putting together a DIY closet is about more than just building each section. It’s also ensuring everything fits well and is strong. With our tips, you can make a closet that’s sturdy and perfect for your storage needs.
Customizing Your Closet with Adjustable Shelving
By adding adjustable shelving to your storage, you’re not just making it neater. You’re also making it easier to change as your needs change.
Creating a Versatile Space with Shelf Pin Holes
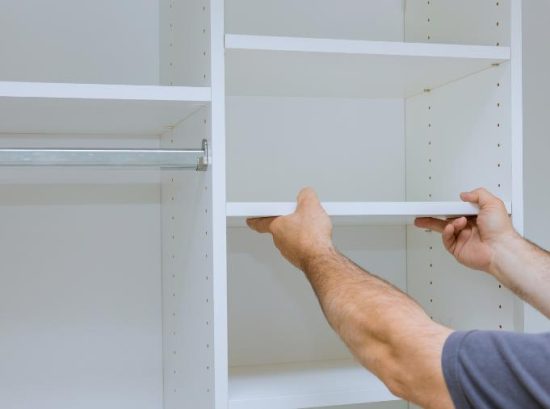
Adding shelf pin holes using a jig lets you move shelves around easily. This is perfect for fitting in different sizes of items. Your closet can easily switch from storing winter clothes to new purchases.
Measuring and Cutting Shelving to Your Chosen Width
It’s very important to measure accurately when cutting shelves. Even a small mistake can affect the smooth look of your closet. After measuring, cut carefully to match your space. This keeps your closet both beautiful and functional.
- Use a sharp cutting tool to ensure clean, straight edges.
- Apply edge banding around the shelf perimeters to create a polished finish.
- Prep the shelving for a final look by sanding, staining, or painting, which not only enhances the appearance but also protects the material.
Following these steps ensures your custom closet is long-lasting and looks great. Attention to detail means every part of your closet works well together.
Finishing Touches: Sanding and Applying Protective Finishes
As you plan the final touches on your DIY closet tutorial, a smooth finish is key. This part will help you sand and add protective finishes to your closet. By doing this, your closet will last longer and look better.
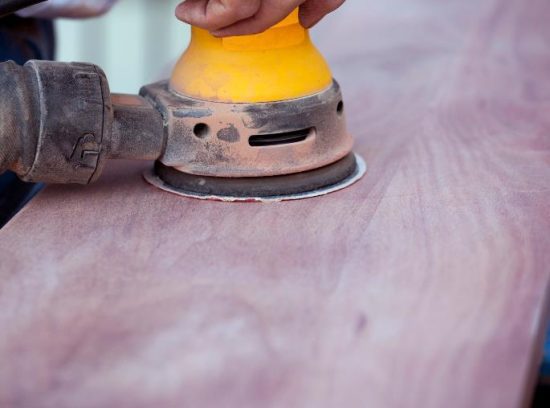
Start with a random orbit sander for big, easy-to-reach spots. Use a fine-grit sandpaper to not mess up the finish. For tight spots, you’ll need to sand by hand. Always go with the grain for a smooth and even look.
- Always wear safety gear: During sanding, it’s crucial to protect yourself from wood dust and debris.
- Check for smoothness: After the initial sanding, make sure it feels even and safe to touch.
- Clean thoroughly: Before you add finish, get rid of all wood dust. It’ll help the finish stick well and look good.
Next, add the protective finish. Water-based polyurethane is great because it’s clear and smells less. Use a brush or foam to add the first coat. Let it dry, then lightly sand before each new coat. Each sanding step is crucial for a strong and lasting finish.
- Apply the first coat evenly, without adding too much.
- Allow adequate drying time before sanding lightly.
- Repeat the process with at least three coats for sturdy protection, especially for busy closets.
Spending time on sanding and finishes is worthwhile. You’re making sure your DIY closet is both useful and beautiful. These steps will keep your closet in great shape for a long time.
Good closet organization is crucial for maximizing your space. By installing closet rods right, you unlock vertical space. This is great for hanging shirts, dresses, and suits.
Cutting Rods to Precise Length for Custom Fit
To make the most of your closet, your rods must fit well. Measure and cut them accurately. You can cut them with an angle grinder or a hacksaw. Making precise cuts keeps your closet sturdy and organized.
Ensuring Proper Installation of Closet Rod Flanges
Putting the closet rod flanges on right is key for a strong, usable storage space. Here’s how:
- Start by measuring where the rods will go. Make sure they’ll be at a good height and evenly spaced.
- On the closet’s plywood sides, mark where the flanges will be.
- Then, use the right screws and maybe drywall anchors to attach the flanges tightly. This makes them strong enough to hold your clothes without breaking.
Getting this setup right does a lot for your closet. It works better and looks great with your custom design.
Closet Customization: Adding Drawers and Additional Features

Enhancing your storage with a custom closet design improves how you keep things organized. Adding drawers and other features can make your closet more efficient. It also lets you design the closet to fit your needs and style.
Looking into closet renovation ideas, we can see how to make your closet better:
- Plan Your Design: Think about how much storage you need and what space you have. Then, draw up a plan. This helps make sure your closet will work just right for you every day.
- Choose Construction Techniques: Use strong building methods for your drawers. Dado joints, dowels, and good glue keep drawers stable and lasting. Quality is key for something you use often.
- Select Materials: Pick materials that look good and are strong. Choose from wood, metal, or composites. You want your closet to hold up well over time.
- Installation Process: Measure and cut everything carefully. Test your drawers to make sure they fit well before setting them in place for good.
- Customize for Accessibility: Add features like pull-out bins or hidden spaces. These make things easier to reach, using your space better.
Add features that fit your style and needs. This makes for a custom closet design that really works with your life and home decor.
With smart closet renovation ideas, your space can look amazing and work well. It turns your closet into a place you love to use every day.
- Quality sliders and hardware mean your closet is more user-friendly.
- Unique touches like cool handles or special drawer liners give your closet character.
- Make sure every addition fits well, balancing both looks and function.
These tweaks will not only organize your space better but also make using it more fun and convenient. Everything you need will be right where you expect to find it.
Conclusion
Starting a DIY closet project teaches you more than making more space. It’s about changing your space to fit what you need. In this guide, you’ve learned key tips for building a closet. These tips make the process smoother and give you the skills to build a space for everything.
Your new closet shows your hard work and skill. What seemed scary became easy with steps to follow. This turns a blank area into a storage that fits you perfectly. By using this advice, you’ve turned DIY into a success.
Success in projects like this comes from being ready and careful with the right tools. As you look at your closet, see more than a new storage. It’s a piece of your hard work and care. It makes your daily life better. So, as you start your next project, use what you’ve learned here. You’ll find success again.
FAQs on Building a Closet
How to build a closet frame?
Measure your space, cut wooden frames to size, assemble using screws and brackets, and ensure everything is level and securely attached to the wall.
How to build a closet shelf?
Cut shelves to desired size, install supports on the closet walls, and place the shelves on the supports, securing them with screws.
How to build a closet on a slanted wall?
Design the frame to match the angle of the slant, secure it to the studs, and use custom-cut shelves and rods to fit the slanted design.


