Changing the wax ring on your toilet is one essential maintenance task that keeps your bathroom functional and hygienic. If you smell something bad or see indications of a leak near the base of your toilet, it could be time to take on this project. Completing this task correctly can save you time and possibly money on future repairs. While planning to do this, how to replace wax ring on toilet is the question asked by everyone.
What is a Wax Ring?
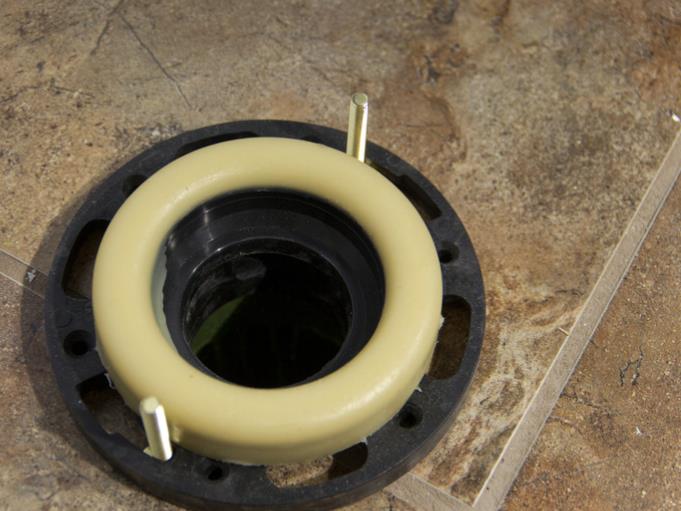
A component that resembles a gasket is a wax ring. It is situated between the plumbing drain and the bottom of the toilet. Sealing the joint is its primary function. This seal keeps sewage gasses and water from seeping into your house. Moldable wax is used to create the ring. It may adapt to the contours of the drain and the toilet thanks to this material. It thereby produces a tight seal. This seal can break down with time. The breakdown may result in leaks and nasty smells. To guarantee this seal’s integrity, it is advised to conduct routine examinations.
Why Do We Have to Replace the Wax Ring?
The wax ring can damage over time. The toilet’s settling or shifting could also cause it to become misaligned. These changes frequently lead to leakage. Leaks that occur often suggest that the seal has been broken. The ring must be changed immediately. By taking this procedure, water damage to the flooring and subflooring is avoided. Water damage might develop into more significant problems. These problems include structural damage and the formation of mold. If these issues are resolved, they may become affordable. Frequent maintenance guarantees the seal’s durability and efficacy. Regularly inspecting the wax ring might help prevent unplanned repairs. Maintaining a perfect seal keeps the toilet clean and practical.
Tools Required
To replace the wax ring, you will want a few essential tools:
- Adjustable wrench
- Putty knife
- Gloves
- Old towels or rags
- A new wax ring
- Optionally, a bucket to catch any residual water
Ensuring you have all the necessary tools before starting the job will help streamline the process and prevent mid-project runs to the hardware store.
The Seven Steps on How to Replace Wax Ring on Toilet
Step 1: Turn Off the Water Supply
Locate the water supply valve before you start. Usually, it’s close to the toilet’s base. Rotate the valve in a clockwise direction. This will shut it down and cut off the water’s flow. It is essential to make sure that the water is turned off entirely. It stops any accidental spillage while the repair is being done. This is the first and most crucial step in avoiding water problems. Verify again that the valve is closed all the way. You follow the techniques below, which are safer and easier if you start in a dry place.
Step 2: Flush the Toilet
Let’s start with the toilet flush. This will empty the tank. To release the maximum amount of water, press the handle. There will still be some water after flushing. Utilize towels or a sponge to absorb any remaining water. Ensure that the bowl and the tank are completely dry. This guarantees a more hygienic work area. Additionally, it keeps water from overflowing when the toilet is removed. Drying the area ultimately helps to prevent any possible mess during the restoration.
Step 3: Disconnect the Water Supply Line
Find the water supply line connection at the toilet to start. For this task, use an adjustable wrench. The water supply pipe from the bathroom should be carefully loosened and disconnected. Have a bucket on hand. Any water that drips out will be collected in the bucket. By doing this, water is kept from leaking onto the floor. To manage the flow of leftover water, be sure to go slowly. This reduces the possibility of water damage occurring during removal. To keep the work area dry, collect all the water in the bucket. If this stage is handled correctly, the process remains safe and orderly.
Step 4: Remove the Toilet
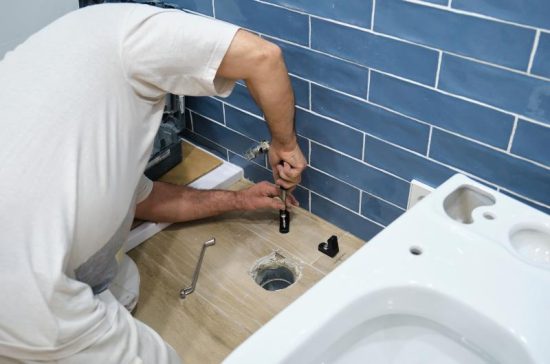
Find the bolts holding the toilet to the floor first. Now loosen these bolts with a wrench. Before attempting to remove them, be sure they are completely loose. After removing the bolts, gently rock the toilet back and forth. This swaying motion partly breaks the original wax ring’s seal. Be careful not to use excessive force, which could harm the flooring or the toilet. Crack the seal and carefully raise the toilet straight up. Make sure your grip is tight to prevent mishaps. Set the toilet aside on a cushioned surface, like a newspaper or an old towel. This keeps the floor clean from any leftover wax or water.
Step 5: Clean the Flange
Take off the old wax ring first. For this job, a putty knife works well. With caution and care, remove any remaining wax residue from the flange. Thorough cleaning of the flange is essential. A clean flange ensures the correct adhesion of the new ring. Look for any indications of damage on the flange. Seek for fractures or cracks. Before proceeding, the flange should be replaced if it is broken. Even with a new wax ring, leaks from a damaged flange may still occur. Make sure the surface is debris-free and smooth. This kind of planning is essential to a successful seal. The new installation’s efficacy depends on the flange’s integrity and cleanliness.
Step 6: Install the New Wax Ring
Choose the new wax ring first. Verify that it fits the requirements for your toilet. On the flange, position the fresh wax ring. Make sure the center is precisely in the middle. This is essential to a good seal. Specific wax rings come with a rubber funnel attached. The funnel needs to be pointed downhill. It must be in line with the drain. This orientation guarantees a tight fit and stops leakage. To secure the ring, lightly press on it. Pressing too firmly could cause the shape to become distorted. Maintaining a leak-free toilet depends on the wax ring being installed correctly.
Step 7: Reinstall the Toilet
With caution, lower the toilet back onto the flange. Please make sure the bolts line up precisely with it. Firmly apply pressure to the toilet. The wax seal is used in this manner. Put the bolts back on firmly. To tighten them, utilize a wrench. Reattach the water supply line to the toilet after the bolts have been tightened. To let water enter the tank, open the valve. Keep an ear out for any leaks or strange sounds. To check for leaks, flush the toilet one last time. By doing this, you can be sure the installation went well. The toilet is ready for use if there are no leaks.
Conclusion
Wax ring replacement is an easy yet necessary maintenance task. It is essential for stopping sewage gas leaks and water damage. It is possible to finish the task efficiently if you follow the steps given in this article. Maintaining a suitable seal is essential to your toilet’s continuous operation. Periodic maintenance inspections are recommended. They aid in the early detection of any possible problems. By taking preventative measures, you may extend the life of your fittings. It also lessens the possibility of future expensive repairs. You can save time and money in the future by taking the time to complete this maintenance operation now. A healthier and cozier home environment will result from your diligent toilet maintenance.
FAQs
Can I reuse the old wax ring?
It’s not recommended to reuse the old wax ring as it may have lost its shape or become damaged during removal.
Do I need to replace the flange when replacing the wax ring?
If the flange is damaged or cracked, it’s good to change it to ensure a proper seal and prevent future leaks.
What tools do I need to replace the wax ring?
You will need an adjustable wrench, a putty knife, gloves, old towels or rags, a new wax ring, and a bucket to catch any dripping water.
How often should I check the wax ring?
Regular maintenance and observations are recommended to ensure the integrity of the wax ring seal. Checking it periodically can help identify any issues early on and prevent leaks.