Are you tired of that worn-out, unappealing table sitting in your dining room? Perhaps you’ve considered buying a new one, but the cost and environmental impact are holding you back. Well, what if I told you that you could transform that old table into a stunning centerpiece that will leave your guests in awe?
Refinishing a table may sound like a daunting task, but with the right guidance and a few easy steps, you can achieve professional-quality results without breaking the bank. Whether you’re a seasoned DIY enthusiast or a novice looking to embark on your first furniture restoration project, this comprehensive guide will walk you through everything you need to know.
From understanding the allure of DIY table refinishing to learning the art of giving old furniture new life, we’ll explore cost-effective alternatives to purchasing new tables and highlight the environmental benefits of refinishing. But that’s not all— we’ll also address common questions and misconceptions, such as whether you can refinish just the top of a table without sanding and how much it actually costs to refinish a table.
Ready to bring your table back to life? Let’s dive in and discover how to refinish a table like a pro!
The Allure of DIY Table Refinishing
When it comes to home improvement projects, refinishing a table offers a unique and rewarding experience. Not only does it give you the opportunity to unleash your creativity, but it also allows you to breathe new life into old furniture. DIY table refinishing has become increasingly popular as people discover the benefits and satisfaction of transforming worn-out tables into stunning pieces that reflect their personal style and taste.
The Art of Giving Old Furniture New Life
Refinishing a table is an art form that requires a blend of skill, patience, and creativity. It’s an opportunity to showcase your craftsmanship by carefully stripping away the old finish and applying a fresh coat that enhances the natural beauty of the wood. Whether you want to restore a family heirloom or update a thrifted find, refinishing allows you to preserve the character and charm of the piece while adding your unique touch.
Cost-Effective Alternatives to New Purchases
One of the significant advantages of DIY table refinishing is its cost-effectiveness. Instead of purchasing a brand new table, refinishing allows you to achieve a similar result at a fraction of the cost. By investing in quality refinishing supplies and putting in some elbow grease, you can transform a tired and dated table into a stunning centerpiece for your home. It’s a budget-friendly option that not only saves you money but also allows you to customize the look to complement your existing décor.
The Environmental Benefits of Refinishing
Choosing to refinish a table instead of buying new furniture also has environmental benefits. By repurposing and rejuvenating an existing piece, you contribute to reducing waste and lessening the demand for new materials. Refinishing promotes sustainability and allows you to be conscious of your environmental footprint. It’s a way to embrace eco-friendly practices while enjoying the satisfaction of breathing new life into an old piece of furniture.
What You Need to Know Before Starting Your Refinishing Project
Before embarking on your table refinishing project, it’s important to understand the key aspects of the process. Here are some essential points to consider:
- Can you refinish just the top of a table? Yes, refinishing just the top of a table is a common practice. It allows you to breathe new life into your table while preserving its original character.
- Can you refinish a table without sanding? While sanding is often recommended to achieve the best results, there are alternative methods like using liquid sandpaper or chemical strippers that can help you refinish a table without extensive sanding.
- How much does it cost to refinish a table? The cost of refinishing a table can vary depending on factors such as table size, condition, materials used, and the complexity of the project. On average, you can expect to spend between $200 to $500 for a professional refinishing job.
- What does it mean to refinish a table? When we talk about refinishing a table, it refers to the process of stripping the old finish, repairing any damage, sanding the surface, and applying a new finish, such as stain or paint, to enhance its appearance.
- What is the easiest way to refinish a table? The easiest way to refinish a table is to opt for a less intensive method, such as using a liquid sander, or choosing a finish that requires minimal sanding and preparation. However, keep in mind that the level of ease may vary depending on your woodworking skills and the condition of the table.
How to Refinish a Table: Gearing Up with the Right Supplies
Before diving into the process of refinishing your table, it’s crucial to gather and prepare the necessary supplies. Having the right tools will ensure a successful and efficient project. Here are some essential cleaning supplies, sandpaper, tools, and options for stain or paint:
Essential Cleaning Supplies
Prior to refinishing your table, it’s important to clean the surface thoroughly. Gather the following cleaning supplies:
- All-purpose cleaner
- Soft cloths or sponges
- Bucket of warm water
- Mild detergent
By using these supplies, you can effectively remove dirt, grime, and any previous finishes that may hinder the refinishing process.
Choosing Your Sandpaper and Tools
Sanding is a crucial step in preparing the table for refinishing. The right sandpaper and tools can make the process much smoother. Consider the following options:
- Coarse-grit sandpaper (such as 80-grit) to remove the old finish
- Medium-grit sandpaper (around 120-grit) for smoothing the surface
- Fine-grit sandpaper (approximately 220-grit) for achieving a smooth finish
- Sanding block or electric sander for convenience and efficiency
These tools will help you achieve a smooth and even surface, preparing it for the next steps of refinishing.
Deciding Between Stain or Paint
One of the key decisions you’ll need to make when refinishing your table is whether to use stain or paint. Both options offer distinct advantages, and your choice depends on the desired aesthetic and personal preference.
If you wish to enhance the natural beauty of the wood grains, stain is the recommended choice. Stain penetrates the wood to showcase its unique characteristics while providing protection.
On the other hand, if you prefer a solid color or want to cover up imperfections, paint can transform the table with a fresh and vibrant appearance. Paint also offers more options for color customization.
Consider the overall look you want to achieve and select the most suitable option that aligns with your vision.
By having these essential cleaning supplies, sandpaper, tools, and deciding between stain or paint, you are now ready to proceed with refinishing your table and restoring its natural beauty.
Understanding Your Table’s Current Condition
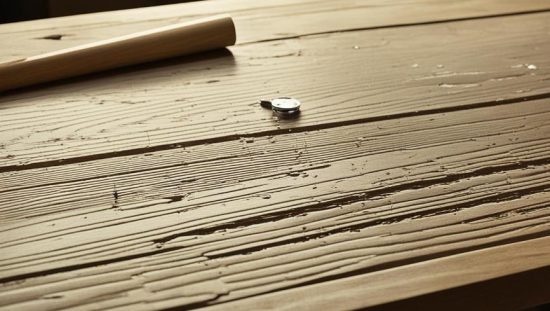
Before you embark on your table refinishing project, it’s important to assess the current condition of your table. This step will help you determine whether your table needs to be refinished or if it can be salvaged in its current state.
When inspecting your table, look for signs that indicate it needs to be refinished. One of the key indicators is the presence of scratches, dents, or deep gouges on the tabletop. These imperfections not only affect the table’s aesthetic appeal but can also compromise its functionality.
Another important aspect to consider is the condition of the table’s finish. Over time, the finish may become worn, faded, or damaged, particularly in high-touch areas. If you notice any flaking or peeling of the finish, it’s a clear indication that your table requires refinishing.
Additionally, pay attention to any water stains, heat marks, or discoloration on the tabletop. These issues can occur from spills, hot objects, or prolonged exposure to sunlight. Refinishing the table can help restore its original beauty and protect it from further damage.
When assessing the condition of your table, it’s essential to inspect the overall stability as well. Check for loose joints, wobbly legs, or any other structural issues that may affect its functionality. Refinishing the table provides an opportunity to address these issues and ensure its long-term durability.
By carefully examining your table and noting any imperfections or signs of wear, you’ll be able to make an informed decision regarding the need for refinishing. Remember, refinishing offers a chance to breathe new life into your table and create a stunning centerpiece for your space.
Prep Like a Pro: Cleaning and Sanding Techniques
Before diving into the refinishing process, it’s essential to properly prepare your table. This involves two crucial steps: effective cleaning and sanding. By following these techniques, you’ll create the perfect base for refinishing and ensure optimal results.
Effective Cleaning for Optimal Results
Cleaning your table thoroughly is the first step towards a successful refinishing project. Start by removing any dust, dirt, or grime from the surface. Use a gentle yet effective cleaning solution suitable for your table’s material. Be sure to follow the manufacturer’s recommendations. Wipe the table clean using a soft cloth or sponge.
For stubborn stains or residue, you may need to apply a bit more elbow grease. Avoid using harsh abrasives or chemicals that could damage the wood. Instead, opt for a mild cleaner or a mixture of vinegar and water for a natural alternative. Gently scrub the affected area with a soft brush or cloth.
After cleaning, allow the table to dry completely. This ensures that the refinishing materials adhere properly and results in a beautiful, long-lasting finish.
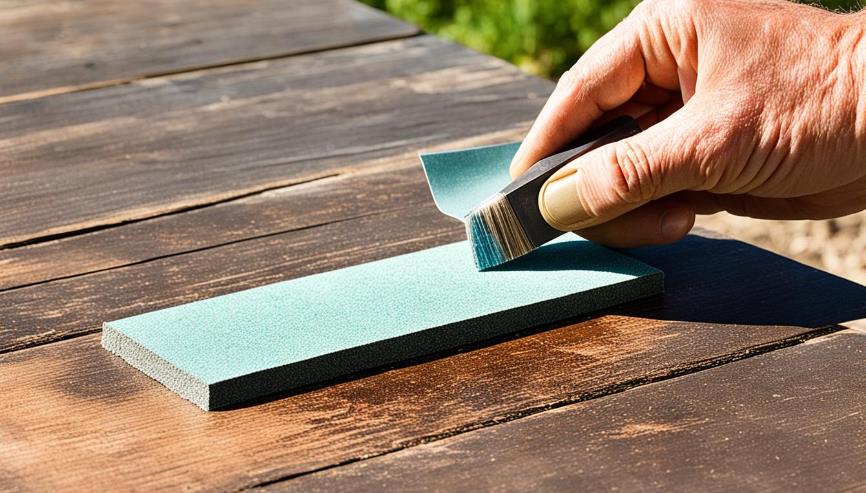
Sanding: Creating the Perfect Base for Refinishing
Once your table is clean and dry, it’s time to move on to sanding. Sanding is an essential step that removes the old finish and creates a smooth surface for the new one to adhere to.
Begin by selecting the proper sandpaper grit for your table. The best way to approach this is to start with a coarser grit, such as 80 or 100, to remove any existing finish or imperfections. As you progress, gradually switch to finer grits, such as 150 or 180, to refine the surface and achieve a smoother finish.
Sand the table in the direction of the grain, applying even pressure. Be sure to sand the entire surface, including edges and crevices. Check your progress frequently to avoid oversanding or uneven results.
After sanding, use a tack cloth or a clean, damp cloth to remove any dust or debris on the table. This step is vital to ensure a flawless final finish.
By following these proper cleaning and sanding techniques, you’ll lay the foundation for a successful table refinishing project. Your table will be ready for the next step: removing the old finish and applying a fresh coat to bring new life to your furniture.
Removing the Old Finish: Strategies and Safety
When it comes to refinishing a table, one of the crucial steps is removing the old finish. This process ensures that the new finish adheres properly and results in a polished and professional look. In this section, we will explore different strategies to remove the old finish and discuss essential safety precautions to follow.
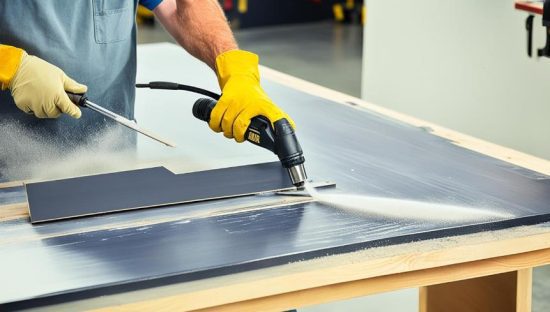
Comparing Chemical Strippers and Sanding
There are two primary methods for removing the old finish from a table: chemical strippers and sanding. Chemical strippers are effective at dissolving the existing finish, making it easier to scrape or wipe away. On the other hand, sanding involves manually sanding away the old finish using sandpaper or a sanding machine.
Chemical strippers offer a quicker and more convenient option for removing the old finish, particularly when dealing with intricate designs or hard-to-reach areas. They are available in various formulas, such as gel or liquid, and it’s important to choose the appropriate one for your specific table. However, it’s important to note that chemical strippers may emit strong fumes and require proper ventilation, as well as the use of protective equipment.
Sanding, on the other hand, provides more control over the removal process and is a great option for tables with thick or stubborn finishes. It allows you to carefully sand away the old finish, revealing the natural beauty of the wood beneath. However, sanding can be time-consuming and labor-intensive, requiring multiple grits of sandpaper for a smooth and even result.
Safety Measures During the Stripping Process
Regardless of the method you choose, it’s crucial to prioritize safety when removing the old finish from your table. Here are some essential safety precautions to follow:
- Protective Gear: Wear gloves, safety goggles, and a respirator mask to shield yourself from any chemicals, dust, or fumes.
- Ventilation: Make sure you are working in a well-ventilated area to prevent the buildup of fumes or dust particles.
- Follow Instructions: Read and follow the manufacturer’s instructions carefully when using chemical strippers to ensure safe and effective application.
- Avoid Open Flames: Keep your work area away from open flames or sources of ignition, as some chemical strippers may be flammable.
- Dispose of Waste Properly: Dispose of any waste materials, such as used chemical strippers or sanding dust, according to local regulations.
- Protect Surrounding Surfaces: Cover and protect any adjacent surfaces or objects that you don’t want to be affected by the stripping process.
By following these safety measures, you can ensure a smooth and safe process while removing the old finish from your table.
| Method | Pros | Cons |
|---|---|---|
| Chemical Strippers | Quick and convenient | Strong fumes, requires proper ventilation |
| Sanding | Greater control, reveals natural wood | Time-consuming, labor-intensive |
The Heart of the Craft: How to Refinish a Table
Now that you have prepared your table by cleaning, sanding, and removing the old finish, it’s time to dive into the heart of the refinishing process. This section will provide you with a step-by-step guide to refinishing a table, ensuring that you achieve professional-looking results.
Before you begin, make sure you have all the necessary supplies and materials on hand. Refer back to Section 4 for a detailed list of essential tools and products.
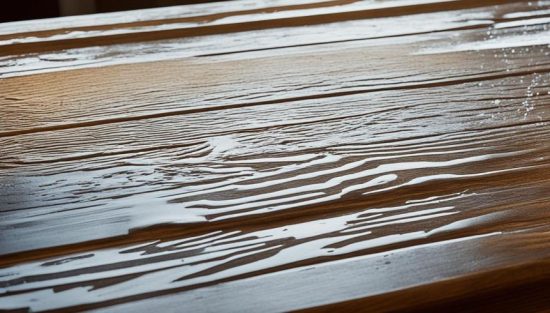
Step 1: Apply the New Finish
Start by selecting your desired finish, whether it’s stain or paint. Choose a finish that complements your personal style and matches the overall aesthetic you want to achieve with your table.
When applying the new finish, follow these easy steps:
- Use a clean, lint-free cloth or brush to apply the finish evenly.
- Apply thin coats rather than thick ones to avoid drips or uneven drying.
- Allow each coat to dry completely before applying the next one.
- Sand lightly between coats to ensure a smooth and even finish.
Remember, patience is key. Take your time and allow each coat to dry thoroughly to achieve the best results.
Step 2: Seal and Protect
After you have applied the desired number of coats and achieved the desired look, it’s time to seal and protect your newly refinished table. Choose a clear sealant or topcoat that is appropriate for the finish you used.
Follow these steps to seal and protect your table:
- Ensure the surface is clean and free of dust or debris.
- Apply the sealant or topcoat using a brush or applicator, following the manufacturer’s instructions.
- Allow the sealant to dry completely.
- For added protection, consider applying multiple coats of sealant, allowing each coat to dry in between.
By sealing and protecting your table, you will not only enhance its beauty but also ensure its durability for years to come.
Tips for Refinishing Like a Pro
Here are some additional tips to help you refine your table refinishing skills:
- Work in a well-ventilated area to ensure proper air circulation and minimize fumes.
- Use the appropriate safety equipment, such as gloves and a respirator, when working with chemicals or sanding.
- Take breaks as needed to avoid fatigue and maintain focus.
- Practice good technique and apply consistent pressure when sanding or applying the finish.
Recommended Finishing Techniques
| Finish | Advantages | Disadvantages |
|---|---|---|
| Stain | Highlights the natural beauty of the wood grain Allows for color customization Durable and long-lasting finish |
Requires proper ventilation Can be challenging to achieve an even color May require multiple coats for desired hue |
| Paint | Offers unlimited color options Hides imperfections in the wood Provides a smooth and uniform finish |
May obscure the natural wood grain Requires multiple coats for a solid color Prone to chipping or scratching over time |
Applying the New Finish: Techniques for Staining and Painting
Mastering Brush and Application Techniques
Once you have prepared your table by cleaning and sanding, it’s time to apply the new finish. Whether you choose to stain or paint, the key to achieving a professional-looking result lies in mastering brush and application techniques. Proper technique will ensure an even and smooth finish that enhances the beauty of your refinished table.
When it comes to staining, choosing the best stain for refinishing a table is essential. Consider the color and type of wood you are working with to achieve the desired result. Always test the stain on a small, inconspicuous area of the table before applying it to the entire surface. This will help you ensure that the color and opacity of the stain are exactly what you want.
When it comes to applying the stain, start by stirring the can to mix the pigments thoroughly. Use a good quality brush with fine bristles, ensuring it is clean and free of any loose fibers. Apply the stain in the direction of the wood grain, using smooth and even strokes. Work in small sections at a time to avoid drying or overlapping. Allow the stain to penetrate the wood for the recommended time, then wipe away any excess with a clean cloth.
If you choose to paint your table instead, choosing the right paint for refinishing a table is crucial. Opt for a paint specifically formulated for furniture or cabinets, as these are designed to provide a durable and long-lasting finish. Consider the color scheme of your space and the desired aesthetic when selecting your paint color.
When it comes to applying the paint, start by preparing your surface with a primer if needed. Use a high-quality brush or foam roller for smooth and even application. Work in thin, even coats, allowing each coat to dry completely before applying the next. This will help prevent drips and ensure a flawless finish. If desired, sand lightly between coats to achieve a smoother surface.
Transforming Your Table with the Perfect Stain or Paint
Choosing the right stain or paint for your table can significantly transform its overall appearance. A carefully chosen stain can enhance the natural beauty of the wood, bringing out its unique grain patterns. On the other hand, a fresh coat of paint can completely change the look and style of the table, allowing you to match it to your existing decor or create a striking focal point.
Consider the overall design aesthetics of your space, the color palette, and the desired mood you wish to convey. Are you going for a rustic, farmhouse look with a rich, dark stain? Or perhaps a sleek, modern vibe with a bold, vibrant paint color? The choice is yours, and by selecting the perfect stain or paint, you can truly transform your table into a statement piece.
Remember, tips for applying stain to a table and techniques for painting a table require practice and patience. Don’t be discouraged if your first attempt doesn’t turn out exactly as you envisioned. Refinishing furniture is a skill that improves with time and experience. Keep experimenting, learning, and refining your technique, and soon you’ll be creating beautifully finished tables that will be the envy of all.
Achieving Flawless Results: Tips for a Professional Finish
When it comes to refinishing furniture, getting a smooth finish is essential for achieving a professional look. Whether you’re refinishing a table or any other piece of furniture, these tips will help you achieve flawless results:
- Start with proper preparation: Before you begin refinishing, make sure you thoroughly clean and sand the surface. Remove any old finish, dirt, or imperfections to ensure a smooth and even base for your new finish.
- Choose the right tools: Invest in high-quality brushes, rollers, or sprayers for applying your new finish. The right tools can make a significant difference in the final result.
- Apply thin and even coats: When applying your stain or paint, it’s crucial to do so in thin and even coats. This helps prevent drips, bubbles, and uneven coloring. Allow each coat to dry completely before applying the next one.
- Sand between coats: To achieve an even smoother finish, lightly sand the surface between coats. This helps remove any imperfections and creates a seamless and professional look.
- Use the right technique: Whether you’re brushing, rolling, or spraying your finish, be consistent with your technique. Follow the grain of the wood and apply the finish in long, smooth strokes for a flawless result.
- Pay attention to drying and curing times: Allow each coat of finish to dry and cure properly according to the manufacturer’s instructions. Rushing this process can lead to a less professional-looking finish.
- Consider a protective topcoat: For added durability and a truly professional finish, consider applying a protective topcoat. This will help protect your refinished table from scratches, stains, and everyday wear and tear.
By following these tips, you’ll be well on your way to achieving a smooth and professional finish when refinishing your table or any other piece of furniture. Take your time, be patient, and enjoy the process of transforming your furniture into a stunning focal point in your space.
Maintaining Your Newly Refinished Table: Long-Term Care and Upkeep
Now that you have successfully refinished your table, it’s important to understand how to properly care for and maintain its newfound beauty. By following a few simple tips, you can ensure that your refinished table remains in excellent condition for years to come.
First and foremost, regularly clean your table using a soft, microfiber cloth. Avoid abrasive cleaners or harsh chemicals as they can damage the finish. Instead, opt for a mild soap and water solution to gently remove any dust or dirt. Be sure to wipe up spills immediately to prevent any potential staining or warping.
Consider using coasters and placemats to protect the surface from heat, moisture, and scratches. Placing hot dishes directly on the table can cause unsightly marks, while spilled liquids can penetrate the finish and lead to discoloration. By using these simple accessories, you can preserve the beauty of your refinished table.
Furthermore, it’s essential to avoid exposing your table to direct sunlight for prolonged periods. UV rays can fade and damage the finish over time. If your table is situated near a window, consider using curtains or blinds to minimize exposure. Additionally, if you need to move your table, always lift it instead of dragging to prevent scratching the floor or damaging the table legs.