Installing a shut-off valve on your toilet is a very important step to ensure the longevity and security of your toilet plumbing. For maintenance or emergencies, this valve lets you turn off the water supply to the toilet without impacting the plumbing in the rest of your house. By learning how to install a shut off valve on a toilet, you may prevent the need for expert assistance and save time and money.
What are the roles of a shut-off valve in toilet?

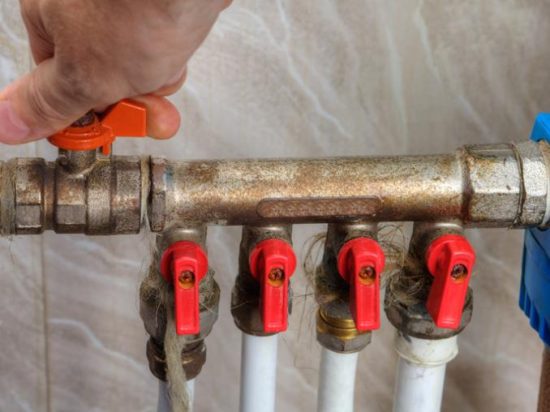
The toilet shut-off valve is known as a stop valve. It is designed to offer you the advantage of stopping water flow into your toilet. This feature is beneficial when there are leaks or when changing or fixing the toilet’s interior parts. You can avoid the clutter and waste of continuous water flow during repairs by turning the valve to put a stop to water from entering the toilet.
In addition, to prevent potential water damage in an emergency, having a working shut-off valve is essential. Most shut-off valves are simple to use and are located where the water line and tank connect at the toilet’s base. Regular maintenance and checking the valve for signs of wear and corrosion can ensure it operates effectively when needed.
Precautions Before Starting Work
Before embarking on the installation process, it’s important to take certain precautions to ensure a smooth and safe operation:
- Turn off the main water supply: Before repairing your toilet, turn off the water supply to your entire home. Usually, this is done at the main water valve, located outside, in the garage, or the basement. While working on the plumbing, turning off the water will stop any sudden water flow or flooding. Open other taps in the house to ensure no water is escaping and confirm that the water is entirely off.
- Empty the toilet tank and bowl: After turning off the water supply, flush your toilet to remove all the water from the bowl and tank. This step will help prevent spills while working. Depress the flush lever to guarantee that the tank empties as much water as possible. Should any leftover water be present, you can eliminate it using a sponge or a tiny cup. Making sure the toilet is entirely emptied will dry out and make your workspace safer to handle.
- Check for compatibility: Before making a purchase, make sure a replacement shut-off valve fits your toilet’s plumbing requirements. Compatibility is essential to guarantee a leak-free installation and appropriate operation. Check the size and type of threads on your old pipe and the material (copper, PVC, or PEX) to ensure a seamless fit with the new valve. Inadequate fits may eventually cause damage or poor performance, requiring more repairs.
- Gather necessary tools: A few simple tools are needed to replace the shut-off valve. You’ll need an adjustable wrench and a tiny pipe wrench to loosen and tighten fittings. Another crucial component is Teflon tape, applied to the pipe connectors’ threads to provide a tight seal. You’ll work more quickly and avoid becoming frustrated when you pause during an installation to find the appropriate tool if you have all these tools ready before you begin.
Step-by-Step Guide on How to Install a Shut-Off Valve on a Toilet
Remove the Old Valve (if present)
To disconnect the old valve from the water supply line, you can take the adjustable wrench to loosen and remove the compression nut. Have a small bucket or thick towel ready to catch any last bits of water leaking from the pipe as you remove the nut. After removing the compression nut, closely inspect the valve and its surroundings for any evidence of damage or corrosion. Ensure the threads are clean and smooth for the new installation by clearing out debris or old Teflon tape.
Applying a tiny amount of plumbing oil may make installing the replacement valve easier if the threads are worn or broken. Finally, inspecting the supply line for any bends or kinks that could impede water flow or cause future leaks is essential.
Prepare the Pipe
Make sure the supply line’s end is immaculate. If it’s copper, use sandpaper to flatten the back and remove any sharp edges gradually. For a tight seal, ensure it’s clear of particles and debris. To balance dirts, use a dry cloth to wipe the pipe after sanding. It’s also good to look for any wear or corrosion on the pipe that can compromise the connection’s integrity.
To guarantee a tight and leak-free connection, wrap the pipe’s threaded section with a fresh Teflon tape layer. Finally, a second check should be run along the entire supply line to ensure no unseen damage or weak areas could jeopardize the installation.
How to Install a Shut off Valve on a Toilet Newly

To facilitate simple valve installation, slide the compression nut onto the pipe and then the compression ring. Apply fresh Teflon tape to the pipe’s threads cautiously, covering every thread equally to preserve a tight seal. Ensure the new shut-off valve is suitable for easy access and operation before attaching it to the pipe.
To prevent cross-threading, manually thread the compression nut while holding the valve stable with one hand. After the nut is hand-tightened, tighten it further using an adjustable wrench, being cautious not to overtighten as this could harm the valve or the threads.
Tighten the Connection
Ensure the new valve fits perfectly against the pipe by hand-tightening the compression nut. After hand-tightening, firmly secure with wrenches. Take care not to overtighten, though, since this could harm the valve or the pipe. Use consistent pressure when tightening with the wrench, and ensure the connection is secure without being strained by doing it often.
To stop further leaks, preserving the integrity of the pipe and valve is critical. Once the valve is tightened, gently test it to ensure there is no resistance and it runs smoothly. Finally, quickly wipe the area to remove dirt or fingerprints and leave a tidy installation.
Reconnect and Test
Ensure the new shut-off valve is tightly fastened before reconnecting the toilet’s supply line. After reconnecting, switch on the main water supply once more and pay close attention to any leaks in the vicinity of the valve. To ensure the valve is operating smoothly and isn’t stiff or leaking, turn it on and off numerous times. Look for any wetness or dripping on the valve and the connection to the water supply line.
If you find any leaks, add Teflon tape to the threads or slightly tighten the connections. To ensure the entire system works correctly, flush the toilet after ensuring no leaks. Finally, keep an eye on the new installation for a few days to catch any delayed leaks or issues that might arise.
Conclusion
Installing a shut-off valve is a practical skill that enhances your home’s plumbing infrastructure. It ensures safety by allowing you to control the water flow directly to your toilet, and it facilitates easier repairs and maintenance. With the steps given above, you can confidently install a new valve, ensuring it operates efficiently and effectively. Regularly check the valve for any signs of wear or leaks as part of your routine home maintenance.
FAQ: Installing a Shut Off Valve on a Toilet
How do I know if I need to replace my toilet’s shut-off valve?
If the shut-off valve on your toilet is leaking, rusty, or not working correctly, you may need to repair it. A faulty shut-off valve can often be identified by a persistent trickle or difficulty turning the valve.
What tools will I need to install a shut-off valve?
An adjustable wrench, a tiny pipe wrench, Teflon tape, and potentially sandpaper if you are working with copper pipes are necessary for installing a shut-off valve. It is also advised to keep a towel and a pail close at hand to collect any leftover water.
Do I need to shut off the water to my house to install the valve?
Yes, it’s best to switch off your home’s main water supply while installing a new shut-off valve. As you work on the plumbing, this stops any water flow and possible flooding.
How do I prevent leaks in the new shut-off valve?
Make sure all connections are snug but not too tight to avoid leaks. Apply Teflon tape to the pipe connectors’ threads to make a watertight seal. Once installation is complete, observe the valve and turn on the water supply again to look for leaks.
How often should I check the shut-off valve after installation?
Checking the new shut-off valve soon after installation and then regularly is a brilliant idea. Frequent inspections during standard bathroom maintenance can assist in identifying and resolving any concerns before they worsen.

