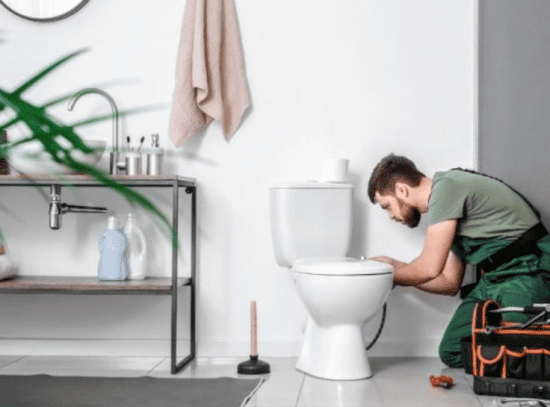
Starting a home project can be both exciting and a little scary. Imagine if you could handle a big job on your own, like putting in a new toilet. Don’t worry if the idea seems daunting. This DIY toilet installation guide will make you confident in setting up a new toilet on a concrete floor. Step by step, we’ll show you how to install toilet.
Maybe you’re updating your bathroom or just getting a new toilet. This guide is here to help. With the easy steps you’ll learn, and if your plumbing is ready, you can do it. You’ll go from being unsure to feeling like a pro in no time. Let’s show you how to confidently put in a new toilet!
Key Takeaways
- Learn the essential steps for successful DIY toilet installation on a concrete slab.
- Understand the importance of pre-existing, roughed-in plumbing for a hassle-free process.
- Discover the critical tools and materials needed for securing a new toilet.
- Gain insights into the intricacies of fitting a skirted toilet to existing plumbing foundations.
- Acquire the knowledge to use the right techniques for an efficient and effective installation.
Preparing for Your Toilet Installation
If you’re a beginner wanting to install a toilet for beginners, you must start with the basics. Know your plumbing’s condition is step one for your toilet installation. Toilets on a concrete floor with existing plumbing are easier to deal with. Setting up new ones elsewhere can be trickier.
To make things easier, here are toilet installation tips to help with plumbing checks:
| Step | Description | Checks |
|---|---|---|
| 1 | Check drainage and water supply rough-in | Make sure floor and wall cutouts fit and you’re near the water line as needed. |
| 2 | Inspect flooring condition | Check if the concrete floor is even; fix any cracks. For wood floors, make sure they’re firm and can resist water. |
| 3 | Verify local plumbing codes | Check that all plans agree with local building rules. This keeps you from legal trouble and redoing work. |
| 4 | Measure space for toilet installation | Ensure there’s enough room for the toilet and the door can open freely, especially in small bathrooms. |
After ensuring everything technical for the toilet installation is in order, it’s time to compare with the manual. A mismatch now could cause major issues. It might even affect your toilet’s use or need significant fixes later on.
Keep in mind, a great toilet installation starts with good prep. Getting ready for this job means more than just finishing it. It makes sure your bathroom works and looks the way you want. Best of luck!
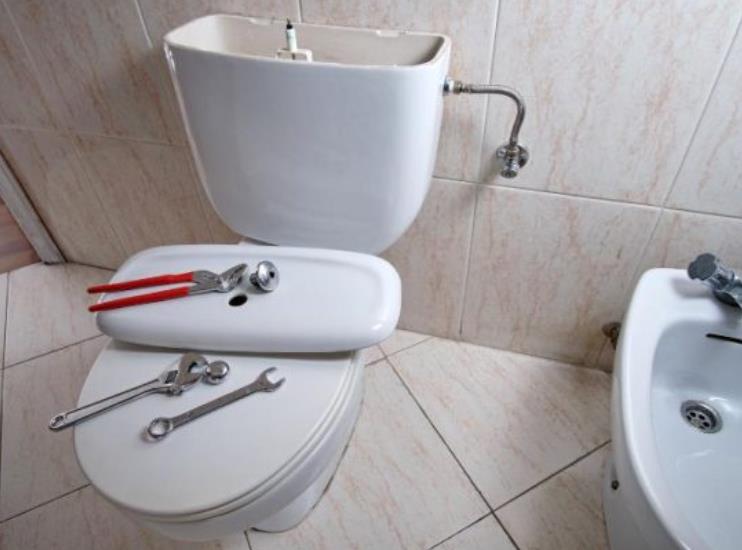
Gathering the Right Tools for DIY Toilet Installation
Getting your tools ready is step one in setting up a toilet yourself. Here you’ll learn which tools are key for a smooth and secure setup.
-
Measuring and Cutting Tools
Perfect measurement and cutting are vital for toilet setup. Grab a good tape measure and a pencil for exact markings. Use a Dremel with a cutting wheel for pipes and adjusting stuff. For big, straight cuts, a pull saw could be your best bet.
-
Safety Equipment
Staying safe is crucial when setting up a toilet. Always wear top-notch safety glasses to shield your eyes from pieces flying around. Tough gloves help protect your hands from sharp bits and give you a better hold on tools.
-
Specialized Plumbing Tools
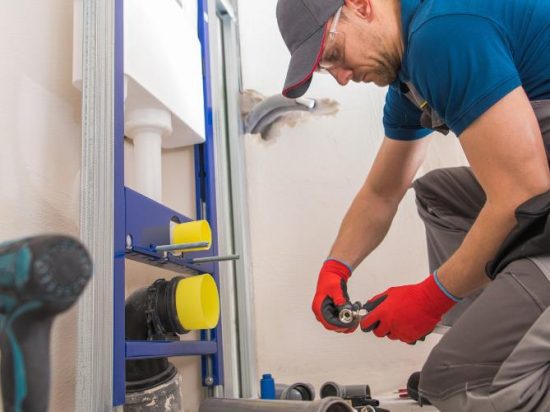
For the plumbing part of toilet installation, some tools are a must. A tube cutter keeps PEX or copper pipes leak-free. If you’re dealing with a concrete subfloor, you’ll need a hammer and masonry chisel to fit the closet flange correctly.
Choosing the Right Toilet and Installation Materials
Upgrading your bathroom means picking the right toilet and installation items. It’s important for the look of your bathroom and to fit your plumbing. For an easy toilet installation, pick a model that fits your bathroom and plumbing well.
Toilets need basic items like a flange, supply lines, and mounting gear for setup. The flooring type affects the materials used. So, concrete floors use special anchors, and wood floors need strong wood screws.
| Material | Subfloor Type | Note |
|---|---|---|
| Concrete Anchors | Concrete | Ensures strong fixation |
| Wood Screws | Wood | Secures flange without splitting wood |
| Press-fit Toilet Flange | Any | No cement needed, easy to install |
| One-piece Toilet Supply Line | Any | Simplifies the connection process |
| Escutcheon Plate | Any | Provides a clean finish |
Choosing the right materials can make toilet installation easier. A press-fit style toilet flange is a great option because it’s simple to install and doesn’t need cement. This makes the whole process cleaner and more straightforward.
Think about future maintenance and upgrades when you pick your toilet and materials. Choosing quality and well-suited items can spare you from extra costs, time, and trouble down the road.
How to Install Toilet?
1. Starting with Flange on Different Subfloors
When setting up a toilet, knowing the right way to install your flange is key. This is especially true for different subfloor types like concrete or plywood. We will cover how to handle each one, sharing useful tips for your installation.
Installing on a Concrete Slab
Working on a concrete slab means you’ll use some serious tools. You need a masonry chisel and a hammer to make a space for the flange. It’s very important that the flange is perfectly level with the concrete. This stops any wobbling of the toilet. Then, use concrete anchors to keep the flange firmly in place. This lets your toilet stay put, ensuring it’s always stable.
Installation over a Plywood Subfloor
If your toilet sits on plywood, things are a bit easier. Use a wood chisel or an oscillating multitool to make space for the flange. It must be level with the plywood. Use wood screws to secure the flange well. A well-fitted flange keeps the toilet in the right spot, preventing it from moving.
| Material | Tools Required | Fasteners |
|---|---|---|
| Concrete Slab | Masonry chisel, Hammer | Concrete anchors |
| Plywood Subfloor | Wood chisel, Oscillating multitool | Wood screws |
Clearly, the way you fix your flange depends on your floor. But whether it’s concrete or plywood, using the right tools and methods is crucial. This builds a solid base for your toilet, ensuring it stays in great shape for a long time.
2. Connecting the Toilet’s Water Supply Line
One key step in installing a toilet is connecting the water supply line. First, you must turn off the main water line. This step keeps your work area dry and clean by removing water pressure and draining any leftover water. It stops accidents like spills during the installation.
It’s vital to use a good tube cutter to measure and cut the supply line accurately. This step avoids putting too much pressure on the pipes, which could cause leaks. After cutting, connect the one-piece supply line. It has a turn valve, which is great for easy fixes later on, and fits different plumbing materials.
| Step | Action | Tools Needed |
|---|---|---|
| 1 | Shut off the main water line | None |
| 2 | Drain remaining water in the line | Bucket |
| 3 | Measure and cut the supply line | Tube cutter |
| 4 | Connect the one-piece supply line | Adjustable wrench |
Connecting the supply line correctly is crucial in toilet installation. It’s your first step to prevent leaks and make sure your toilet works well. Installing the toilet properly right from the start saves you time, money, and effort later. This makes it very important in any bathroom project.
3. Step-by-Step Toilet Bowl Installation Process
Starting a DIY toilet installation might be overwhelming. Yet, with proper guidance, you’ll set up your new toilet bowl securely. Follow these steps for a leak-proof and safe installation.
Setting the Toilet Bowl
First, place the wax ring on the drain. It should fit tightly to keep out any sewage smells. Next, lower the toilet bowl onto the wax ring. Gently move the bowl to flatten the ring.
Securing the Toilet to the Floor
Next, secure the toilet bowl with nuts and washers. Tighten them slowly to avoid toilet damage. Adjust for any uneven flooring with shims. Trim extra bolt if needed for a clean look. Ensure the toilet is firmly attached without over-tightening.
| Step | Details | Tools Needed |
|---|---|---|
| Position Wax Ring | Place the wax ring evenly on the drain. Ensure it’s flush and even to prevent gas leaks. | None |
| Place Toilet Bowl | Lower the bowl over anchor bolts and rock gently to set the ring. | None |
| Level and Secure | Use shims to level on an uneven floor before securing with nuts and washers. | Wrench, Level |
After these steps, your DIY toilet will be set up safely and without leaks. This method is easy to follow, no matter your DIY experience level. It ensures a correct and fast installation of your new toilet.
5. Mounting the Tank to the Toilet Bowl

Now that you’ve set up the toilet bowl, it’s time to attach the tank. This part needs care and precision to make sure it won’t leak later on.
First, place the rubber seal over the tank’s bottom opening. This seal stops water from leaking when you flush. Make sure the seal is right on to work well.
Then, set the tank over the bowl, making sure everything fits perfectly. The bolts should go through the right holes. When in place, start tightening the bolts gently by hand.
Here’s a big tip: tighten the bolts a little at a time, moving from one to the other. This prevents the toilet from cracking under strain. Only use a wrench to tighten it when it’s stable, too much force can break it.
Finally, attach the water supply line and any other parts left. Follow the guide closely to avoid leaks and have a reliable toilet every day.
6. Ensuring a Proper Seal: Working with the Wax Ring
Getting toilet installation right starts with knowing how to use a wax ring. This part is key to stop leaks and make sure your toilet connects tightly to the plumbing. Let’s learn the tips to use a wax ring well. This way, you avoid issues and have a smooth toilet plumbing set up.
Positioning the Wax Ring
Getting the wax ring in the right spot is vital for an easy toilet setup. You can place it on the toilet bottom or on the flange. The most important part is making sure it’s dead center and without any gaps. A well-positioned wax ring means no leaks and helps keep smells away.
Creating a Leak-proof Seal
Once the wax ring is set, carefully put the toilet bowl in place. Push it down evenly to spread the weight on the ring. Don’t let the toilet move side to side or rock back and forth. Doing so can ruin the seal. Remember, the goal is to ensure a tight barrier against leaks for a reliable toilet system.
By following these steps, you can make your toilet setup smooth and trouble-free. The wax ring is vital for a properly working toilet. It’s about knowing its importance in your toilet’s long-term success.
7. Attaching the Water Supply Line to the Tank
Setting up your toilet includes a key step: linking the water supply line to the tank. Start by gently tightening the supply line to your toilet’s intake valve. This makes sure your connection is strong and won’t leak.
Next, it’s wise to check for leaks. Look at the connection closely, and see if there’s any water or moisture. If everything looks good, move on to adjusting the float. This step is vital for the right water level, efficiency, and to avoid water waste.
Here’s a simple list to make sure you’re following the proper steps of a toilet guide:
| Checklist Item | Description | Importance |
|---|---|---|
| Secure Connection | Tighten the supply line by hand to avoid stripping the threads. | High |
| Leak Testing | Check for any moisture that may indicate a leak. | Essential |
| Float Adjustment | Ensure the float is set to maintain the correct water level in the tank. | Critical |
Following these steps means you’re not just setting up a toilet. You’re ensuring your bathroom’s new unit works well and is eco-friendly. Remember, doing the installation correctly is critical for your toilet to last and work properly.
8. Installing the Toilet Seat and Tank Lid
As you finish your diy toilet installation, it’s time to add the toilet seat and tank lid. Getting this part right is key to a stable and comfy toilet. It doesn’t matter if you’re skilled at DIY or just starting, knowing how to install a toilet seat well saves you trouble later.
Start by making sure the toilet seat lines up with the bowl’s rim with no twists. In some toilets, you have to put rubber plugs in the bolt holes first. These help keep the seat in place tightly when you tighten the bolts. If your seat uses a clip, make sure it’s in there securely and doesn’t move.
Then, carefully place the tank lid. It should lay perfectly, without hanging off or being forced into place. Being careful here prevents any damage to the lid.
Always check the guide that comes with your toilet during installation. It’s made to ensure your toilet is sturdy and fits well. Here are the main steps to follow:
| Step | Action | Details |
|---|---|---|
| 1 | Align the Seat | Position the toilet seat so that it aligns perfectly with the toilet bowl. |
| 2 | Secure the Seat | Insert rubber plugs or use a clip system to secure the seat to the bowl. |
| 3 | Place the Tank Lid | Carefully set the lid on top of the tank, ensuring it sits evenly. |
| 4 | Final Inspection | Double-check for stability and proper fit to avoid any wobbling or instability. |
To sum up, putting on a toilet seat and tank lid is simple but needs careful work. Stick to what the manual says and use all provided parts. This part is important for both making your bathroom work well and ending your diy toilet installation with success.
9. Applying the Finishing Touches and Sealing the Base
After setting up your toilet, it’s key to add the final touches. First, create a tight seal around the toilet’s base. This keeps your toilet looking clean and stops mold and bad smells.
If the floor was uneven, you might need to shim your toilet. Always put a foam backer cord around the bottom first. This helps the sealant go on smoothly and makes the finish look good.
Choose a top-notch silicone sealant for the best outcome. Silicone seals keep out water, stains, and mold in the bathroom. After applying with a caulking tool, smooth the silicone with a water-based caulk. Use a cup of water with it. For silicone caulk, use rubbing alcohol to get a neat line.
These toilet installation tips are not just about how to install a toilet. They ensure everything is perfect, even the seals. Now, your toilet is ready for long-term use, looking and working great.
Conclusion
You’ve learned a lot from our detailed guide on setting up a skirted toilet on concrete. We covered each step clearly, making the process easy to follow. You now know everything from the tools you’ll need to the finishing touches for a perfect fit.
Setting up a toilet may seem hard, but we’re here to help. It’s important to follow your area’s plumbing rules and pick the right materials. Whether you’re just starting out or want to do things perfectly, sometimes it’s smart to get a plumber’s help.
By using our guide, you’re closer to enjoying a new bathroom toilet. If you get stuck, plumbers are there to help. Keep up the good work on your home, and now you’re ready to make your bathroom better than ever.
FAQs on Installing a Toilet
What tools will I need for a DIY toilet installation?
How do I prepare for toilet installation on a concrete slab?
If you’re installing a toilet on a concrete floor, start by checking the plumbing. Make sure it follows the right angles and is up to code. Then, get the materials you need for the type of floor you have. For concrete floors, you may need special tools for the project.
How to install toilet flange on a concrete slab?
First, carve out a space in the concrete for the flange to sit. The flange should be level with the floor. Make it secure with the right bolts.
What type of wax ring should I use for installing a toilet?
For installing your toilet, use a standard wax ring. Position it carefully on the flange or base before setting the toilet. This helps create a tight seal.