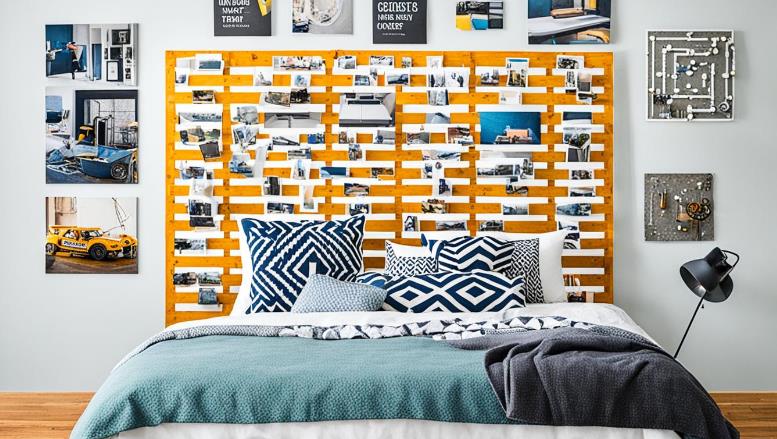
Have you ever wondered how a simple DIY headboard project can transform the entire ambiance of your bedroom without breaking the bank?
Here, you’ll uncover nine inventive and adaptable DIY ideas that will transform your bedroom decor. Ranging from rustic wood pallets to sleek geometric patterns, these custom headboard designs cater to various styles and skill levels. Whether you’re seeking a quick weekend project or a detailed headboard masterpiece, an ideal idea is waiting to ignite your creativity. Learn how to make a headboard decor and craft a statement piece that showcases your distinctive taste.
Headboard Advantages
Creating your own headboard offers numerous advantages that might surprise you. First and foremost, a bedroom furniture upgrade with a custom headboard can significantly enhance room aesthetics. A well-designed headboard serves as a focal point, drawing the eye and setting the tone for the entire space.
Another compelling aspect is the opportunity for personal expression. Custom headboards benefits extend beyond mere appearance; they allow you to inject your personality into your bedroom decor. This personal touch can transform a generic room into a unique, individualized haven.
Moreover, designing a headboard can lead to increased bed comfort. Adding padded fabrics or ergonomic features can provide additional support, making your resting area more comfortable and inviting. This form of bedroom furniture upgrade not only elevates the visual appeal but also enhances the overall functionality of your sleeping space.
In summary, the choice to create a custom headboard brings multiple benefits, from enhancing room aesthetics to personalizing your bedroom decor and improving bed comfort. This DIY project is a fulfilling endeavor that combines creativity with practicality, resulting in a beautiful addition to your home.
1. DIY Wood Pallet Headboard
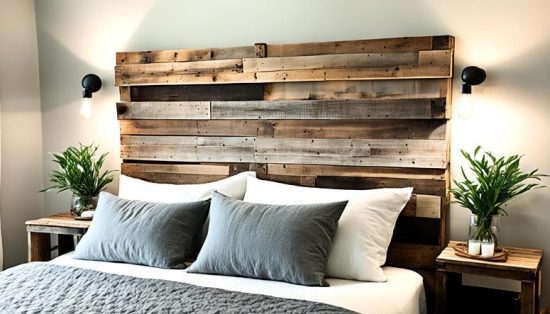
Crafting a wood pallet headboard is an excellent way to transform your bedroom into a rustic haven. This project is perfect for anyone looking to achieve an affordable bedroom makeover. The unique charm of wood pallets can add a cozy, natural vibe to your space, making it both stylish and inviting.
Materials Required and Cost
To start your DIY rustic headboard project, you will need a few essential materials. Gather wood pallets, sandpaper, wood stain or paint, a paintbrush, and mounting hardware. Typically, you can source pallets for free or at a low cost from local warehouses or online marketplaces. Expect to spend around $50-$100 for the entire project, depending on the quality of the materials used.
How to Make a Headboard
Begin by selecting the best wood pallets for your headboard design. Ensure they are clean and in good condition. Sand the pallets to remove any splinters and rough edges, then apply a wood stain or paint of your choice for a polished look. Once dry, arrange the pallets in your desired pattern and secure them together using brackets or screws. Finally, mount your completed wood pallet headboard securely to the wall behind your bed. This rustic masterpiece not only adds character to your room but is also an affordable bedroom makeover solution.
2. Cut-Out Panel Model Headboard
For those seeking a stylish upgrade to their bedroom decor, a modern headboard design offers a sleek and contemporary look. A DIY panel headboard project is an excellent way to inject a sense of custom bed decor into your space while also saving on costs.
Materials Required and Cost
Creating a cut-out panel model headboard requires a few essential materials, including MDF panels, a jig saw, sandpaper, primer, and paint. The costs can vary depending on the quality of materials, but generally, this project remains budget-friendly and accessible for DIY enthusiasts.
How to Make a Headboard
Begin by sketching your desired cut-out shapes on the MDF panels. Carefully use a jigsaw to cut out the shapes, ensuring smooth edges with sandpaper. Once the panels are cut and sanded, apply primer followed by your chosen paint color to match your custom bed decor. After the paint dries, mount the panels on your wall or bed frame for a finished, modern headboard design.
3. Vintage Model DIY Headboard
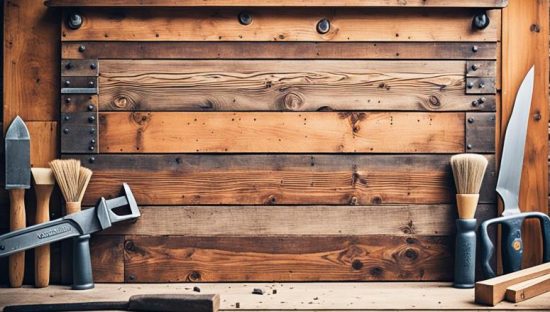
A vintage model DIY headboard can transform your bedroom into a space filled with timeless elegance. By utilizing budget-friendly materials, you can recreate the charm of an antique headboard adhering to classic bedroom design ideas.
Materials Required and Cost
To start your vintage headboard DIY project, you will need the following materials:
- Reclaimed wood or old doors
- Sandpaper
- Wood stain or paint
- Brushes
- Decorative trim (optional)
- Mounting hardware
The cost of materials can vary depending on your location and the specific items you choose, but this project is generally quite affordable. Using reclaimed items can also help you save money while giving your bedroom an authentic antique feel.
How to Make a Headboard
Begin by sanding the reclaimed wood or old doors to remove any rough edges and prepare the surface for staining or painting. Choose a wood stain or paint color that complements your bedroom design ideas. Apply the stain or paint evenly with a brush and let it dry completely.
To enhance the antique headboard creation, you might consider adding decorative trim. This step is optional but can add an extra touch of elegance. Secure the trim to your headboard using nails or wood glue, ensuring it aligns seamlessly with the overall design.
Once all elements are assembled and dried, attach the mounting hardware to the back for easy installation onto your bed frame or wall. This final step ensures your vintage headboard DIY project is sturdy and ready to become the focal point of your bedroom.
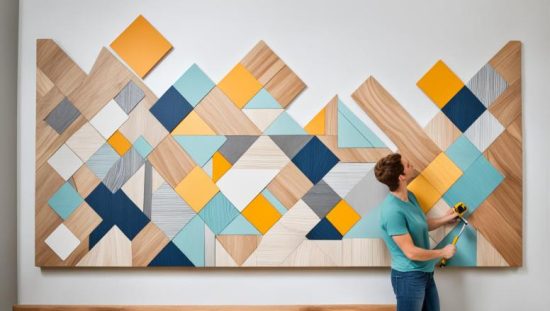
4. Geometric Pattern Headboard
Crafting a geometric pattern headboard can transform your bedroom into a modern and stylish retreat. If you’re aiming for a contemporary bedroom style, a geometric headboard DIY project is an ideal way to infuse an element of uniqueness and creativity into your space.
Materials Required and Cost
For this project, you’ll need a plywood base, painter’s tape, paint in various colors, a paintbrush or roller, and a level. The cost of materials can vary greatly depending on the size of your headboard and the quality of the items you choose. However, it’s possible to assemble everything you need for under $100. Opt for durable paint to ensure your geometric patterns stand out beautifully.
How to Make a Headboard
Begin by preparing your plywood base to the desired size of your headboard. Sand it down to create a smooth painting surface. Next, use the painter’s tape to outline your unique headboard patterns directly on the plywood. This tape will act as your guide for creating sharp, clean lines.
Once your tape is in place, start painting within the marked sections. You can use different colors to highlight various sections, enhancing the geometric design and adding depth to your contemporary bedroom style. Allow the paint to dry completely, then carefully remove the tape to reveal your crisp geometric patterns.
Mount your new headboard behind your bed, securing it to the wall or directly to the bed frame, depending on your preference. Your geometric headboard DIY project is now complete, giving your bedroom a stunning focal point that captures the essence of modern design. Enjoy the refreshed look and the sense of accomplishment that comes with creating your unique headboard patterns.
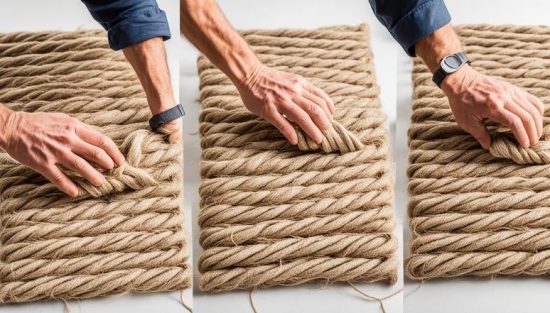
5. Jute Stitched Headboard
If you are looking for an eco-friendly bedroom upgrade, crafting a jute stitched headboard is a fantastic option. This DIY project combines affordability with sustainability, allowing you to enhance your bedroom’s aesthetics while keeping a green thumb.
Materials Required and Cost
The materials you need for this jute headboard tutorial are minimal and cost-effective. You’ll need a wooden frame, jute fabric, batting, a staple gun, and basic sewing supplies. The total cost is relatively low, making it a budget-friendly choice for anyone wondering how to make an easy headboard.
How to Make a Headboard
Start by measuring the size of your bed to determine the dimensions of the headboard. Cut the wooden frame accordingly and tightly wrap it with batting for added comfort. Lay the jute fabric over the batting and staple it securely to the frame’s back. For an extra handcrafted touch, you can stitch patterns or designs into the jute fabric using a needle and thread. This final touch makes your headboard unique and personalized.
6. Plywood Headboard
Creating a plywood headboard is an excellent way to update your bedroom without exhausting your budget. This project provides a straightforward approach to bedroom remodeling with stylish and functional results. Here’s everything you need to know to create a plywood headboard DIY solution that elevates your space.
Materials Required and Cost
For a plywood headboard DIY project, you’ll need the following materials: a sheet of high-quality plywood, sandpaper, wood stain or paint, and varnish. The cost is typically affordable, making it one of the most simple headboard solutions available. Local hardware stores or big-box retailers like Home Depot or Lowe’s can often provide the necessary materials at competitive prices.
How to Make a Headboard
First, measure and cut the plywood to your desired dimensions. Sand the edges to ensure smoothness. Apply your chosen wood stain or paint for that perfect finish, then seal with varnish for added durability. Attach the finished plywood to your bed frame with screws or mounting brackets. In no time, your bedroom remodeling project will be complete, bringing a new touch of elegance to your bedroom.
7. Graphic Headboard
Designing a graphic headboard allows you to infuse your personality or artistic flair directly into your bedroom decor. This creative project is ideal for those who want a unique and personalized bed design. By following the detailed instructions and gathering the necessary materials, you can create a stunning focal point for your bedroom.
Materials Required and Cost
To bring your graphic headboard ideas to life, you will need materials such as plywood or MDF for the base, high-quality paint or fabric for the graphics, adhesive, a measuring tape, and basic tools like a saw and sander. The cost will vary depending on the quality and type of materials chosen, but the investment in personalized bed design is worth it.
How to Make a Headboard
Start by measuring and cutting your plywood or MDF to the desired size. Next, prime the surface to ensure that your paint or fabric adheres properly. Once primed, sketch out your design or prepare your fabric. If you are painting, use stencils to achieve clean lines for your graphics. Attach the fabric or apply paint carefully, and allow sufficient drying time. Attach the headboard to your bed frame using appropriate hardware. By following these steps, you can achieve a custom graphic headboard that enhances your room’s aesthetics.
8. 3D Headboard
Transform your bedroom with a stunning 3D headboard design that introduces depth and texture to your space. Embrace the blend of form and function with this creative bedroom project, ideal for those seeking modern headboard ideas.
Materials Required and Cost
- Wooden panels
- 3D foam tiles
- High-strength adhesive
- Paint or fabric for finishing
- Mounting hardware
The total estimated cost for this creative bedroom project, including wooden panels, 3D foam tiles, adhesive, finishing materials, and mounting hardware, ranges from $95 to $340, depending on the quality and quantity of materials chosen.
How to Make a Headboard
- Choose and prepare your wooden panels, ensuring they are clean and smooth.
- Apply the 3D foam tiles to the panels using high-strength adhesive, following your desired pattern.
- Once fully adhered, paint or cover the panels with fabric for a polished finish that complements your bedroom decor.
- Mount the completed panels to the wall behind your bed using the appropriate hardware, ensuring they are securely fixed.
9. Wood Pillow DIY Headboard
If you’re looking to add both style and comfort to your bedroom, a wood pillow DIY headboard might be the perfect solution. This headboard style combines the natural beauty of wood with the softness of padded pillows, creating an inviting and relaxing atmosphere.
Materials Required and Cost
To create your own wood pillow headboard, you’ll need the following materials: wooden planks, foam padding, upholstery fabric, batting, screws, and mounting brackets. The cost will vary depending on the wood and fabric choices, but this project can generally be completed for under $100, making it a budget-friendly option among comfortable headboard options.
How to Make a Headboard
Begin by measuring your bed to determine the dimensions of your DIY padded headboard. Cut the wooden planks to size and assemble them using screws to form the frame. Next, cut the foam padding and batting to fit the wooden frame, securing them with a staple gun. Cover the padding with your chosen upholstery fabric, pulling it tight and stapling it to the back of the frame.
Attach the mounting brackets to the back of the headboard to ensure it can be firmly fixed to the wall. Once everything is secure, your wood pillow headboard is ready to be installed. This DIY project not only answers questions on how to make a padded headboard but also provides a unique and cozy addition to your bedroom decor.
How to Make Your Headboard More Stylish and Beautiful?
When it comes to enhancing headboard design, choosing the right materials and styling elements can make a significant difference. To elevate your headboard from simple to stunning, considering what fabric is best for a headboard is essential. Options such as velvet, linen, or even faux leather can add texture and sophistication, depending on the overall decor of your bedroom.
Incorporating stylish headboard tips can also greatly improve the bedroom aesthetics. Think about adding decorative elements like nailhead trim, buttons, or tufting. These small details can transform a plain headboard into a beautiful focal point. Moreover, integrating vibrant or bold color schemes can bring out your personal style, making your bedroom feel more customized and unique.
When aiming for bedroom aesthetics improvement, don’t shy away from using mixed materials like wood and fabric to create a layered effect. Adding a headboard with built-in lighting can also provide both functionality and a unique design element. By following these expert tips, you can ensure your headboard not only complements your space but becomes the star of your room.
FAQs on how to make a headboard
How do I choose the right size headboard for my bed?
Measure the width of your mattress and bed frame to determine the appropriate size for your headboard. A general rule is to choose a headboard that is slightly wider than your mattress to create a balanced look.
What tools do I need to make a DIY headboard?
The tools you’ll need depend on the design of your headboard, but common tools include a saw (circular or jigsaw), drill, screwdriver, sandpaper, and measuring tape. You may also need additional tools for specific designs, such as a staple gun or paintbrushes.
Can I make a headboard without woodworking experience?
Yes, many DIY headboard designs are beginner-friendly and require minimal woodworking skills. Look for designs that use simple materials like fabric, foam, or decorative panels that can be easily assembled and mounted.

